

Appearance
Cloudflare R2
Cloudflare R2 is a Storage integration built on S3-compatible object storage. Connect a bucket to serve your video files straight from R2 — public over a bucket domain, or private with short-lived signed URLs — and upload and browse them without leaving Ink Player. Unlike Cloudflare Stream, R2 stores and delivers your file as-is (no transcoding), and its free tier makes it a low-cost home for self-hosted MP4s.
What this enables
- Serve video files from your R2 bucket as public URLs or signed (private) URLs.
- Upload videos to the bucket from the media picker (streamed through your server — your secret key never reaches the browser).
- Browse and search every video in the bucket in one flat list.
Prerequisites
- A Cloudflare account with R2 enabled.
- An R2 bucket to hold your videos.
- For public delivery: public access enabled on the bucket (an
r2.devdomain or a custom domain). Private delivery needs no public domain.
Step 1 — Create a bucket
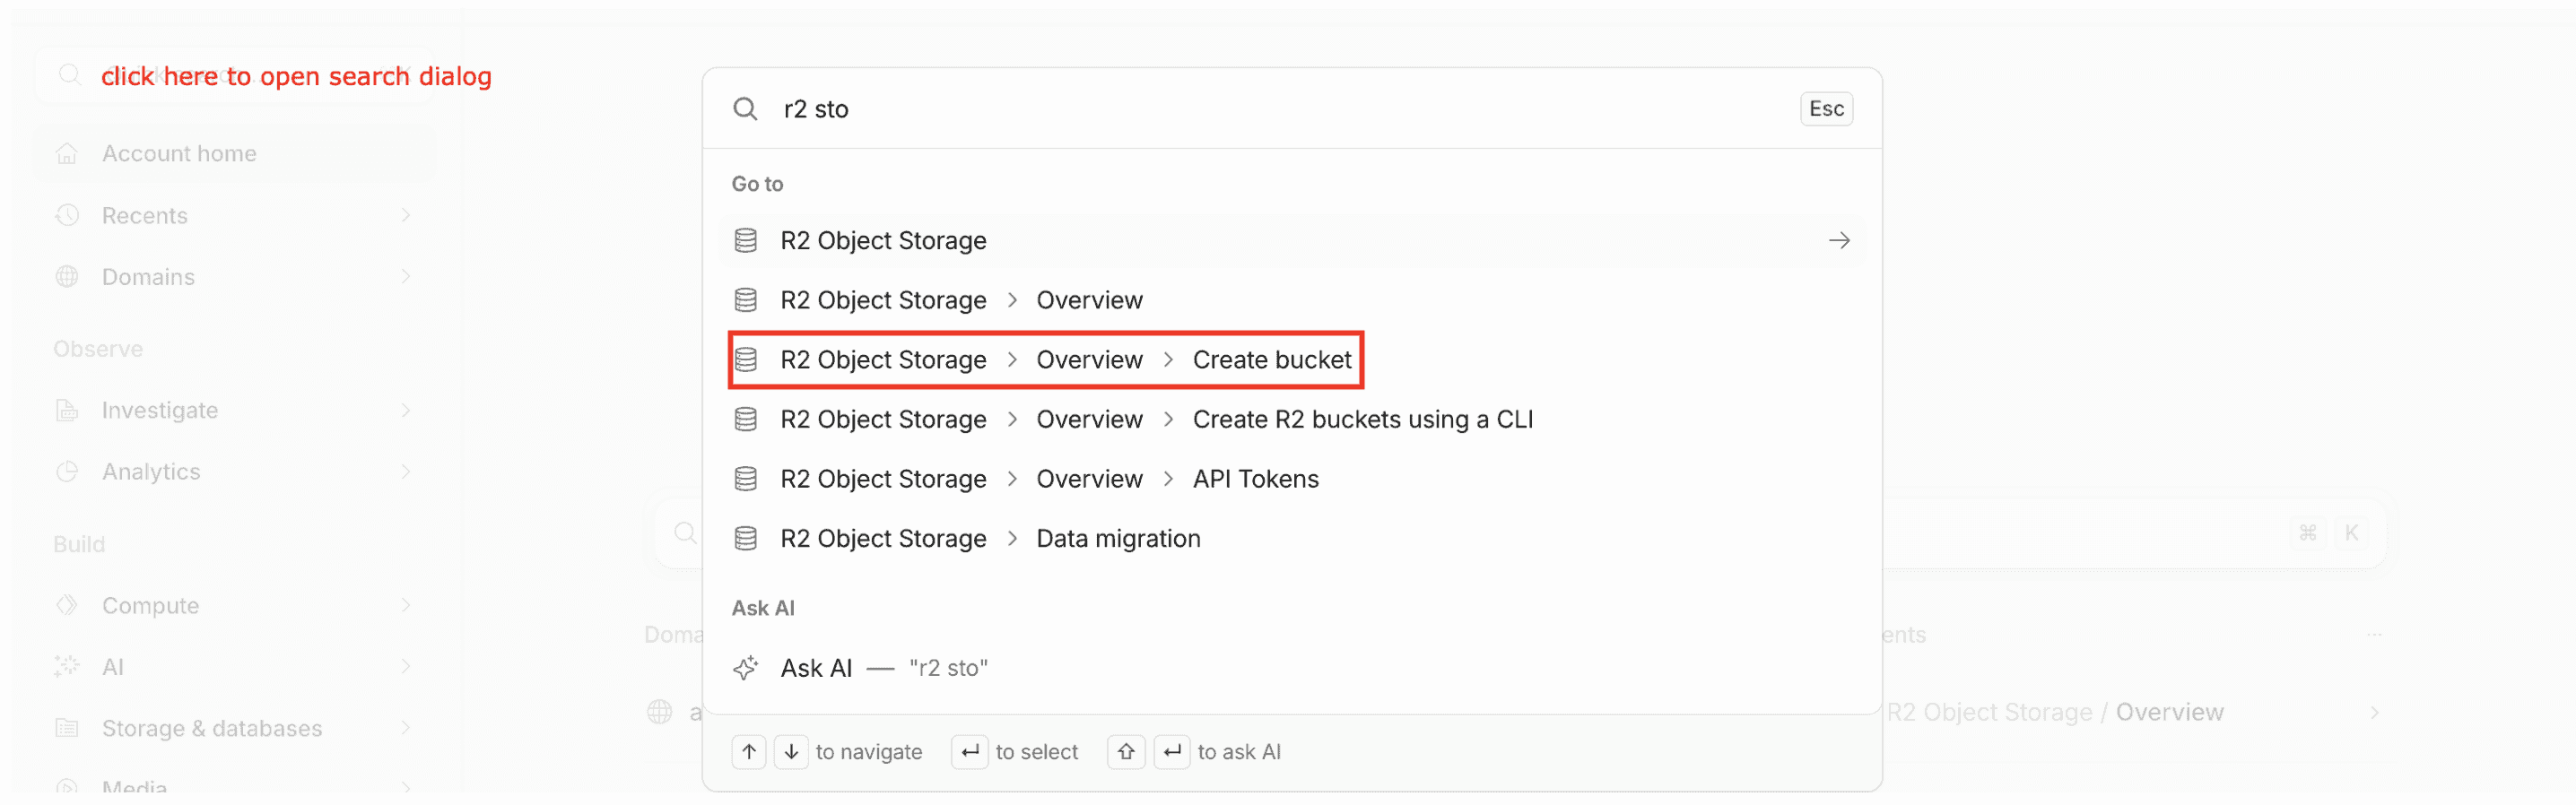
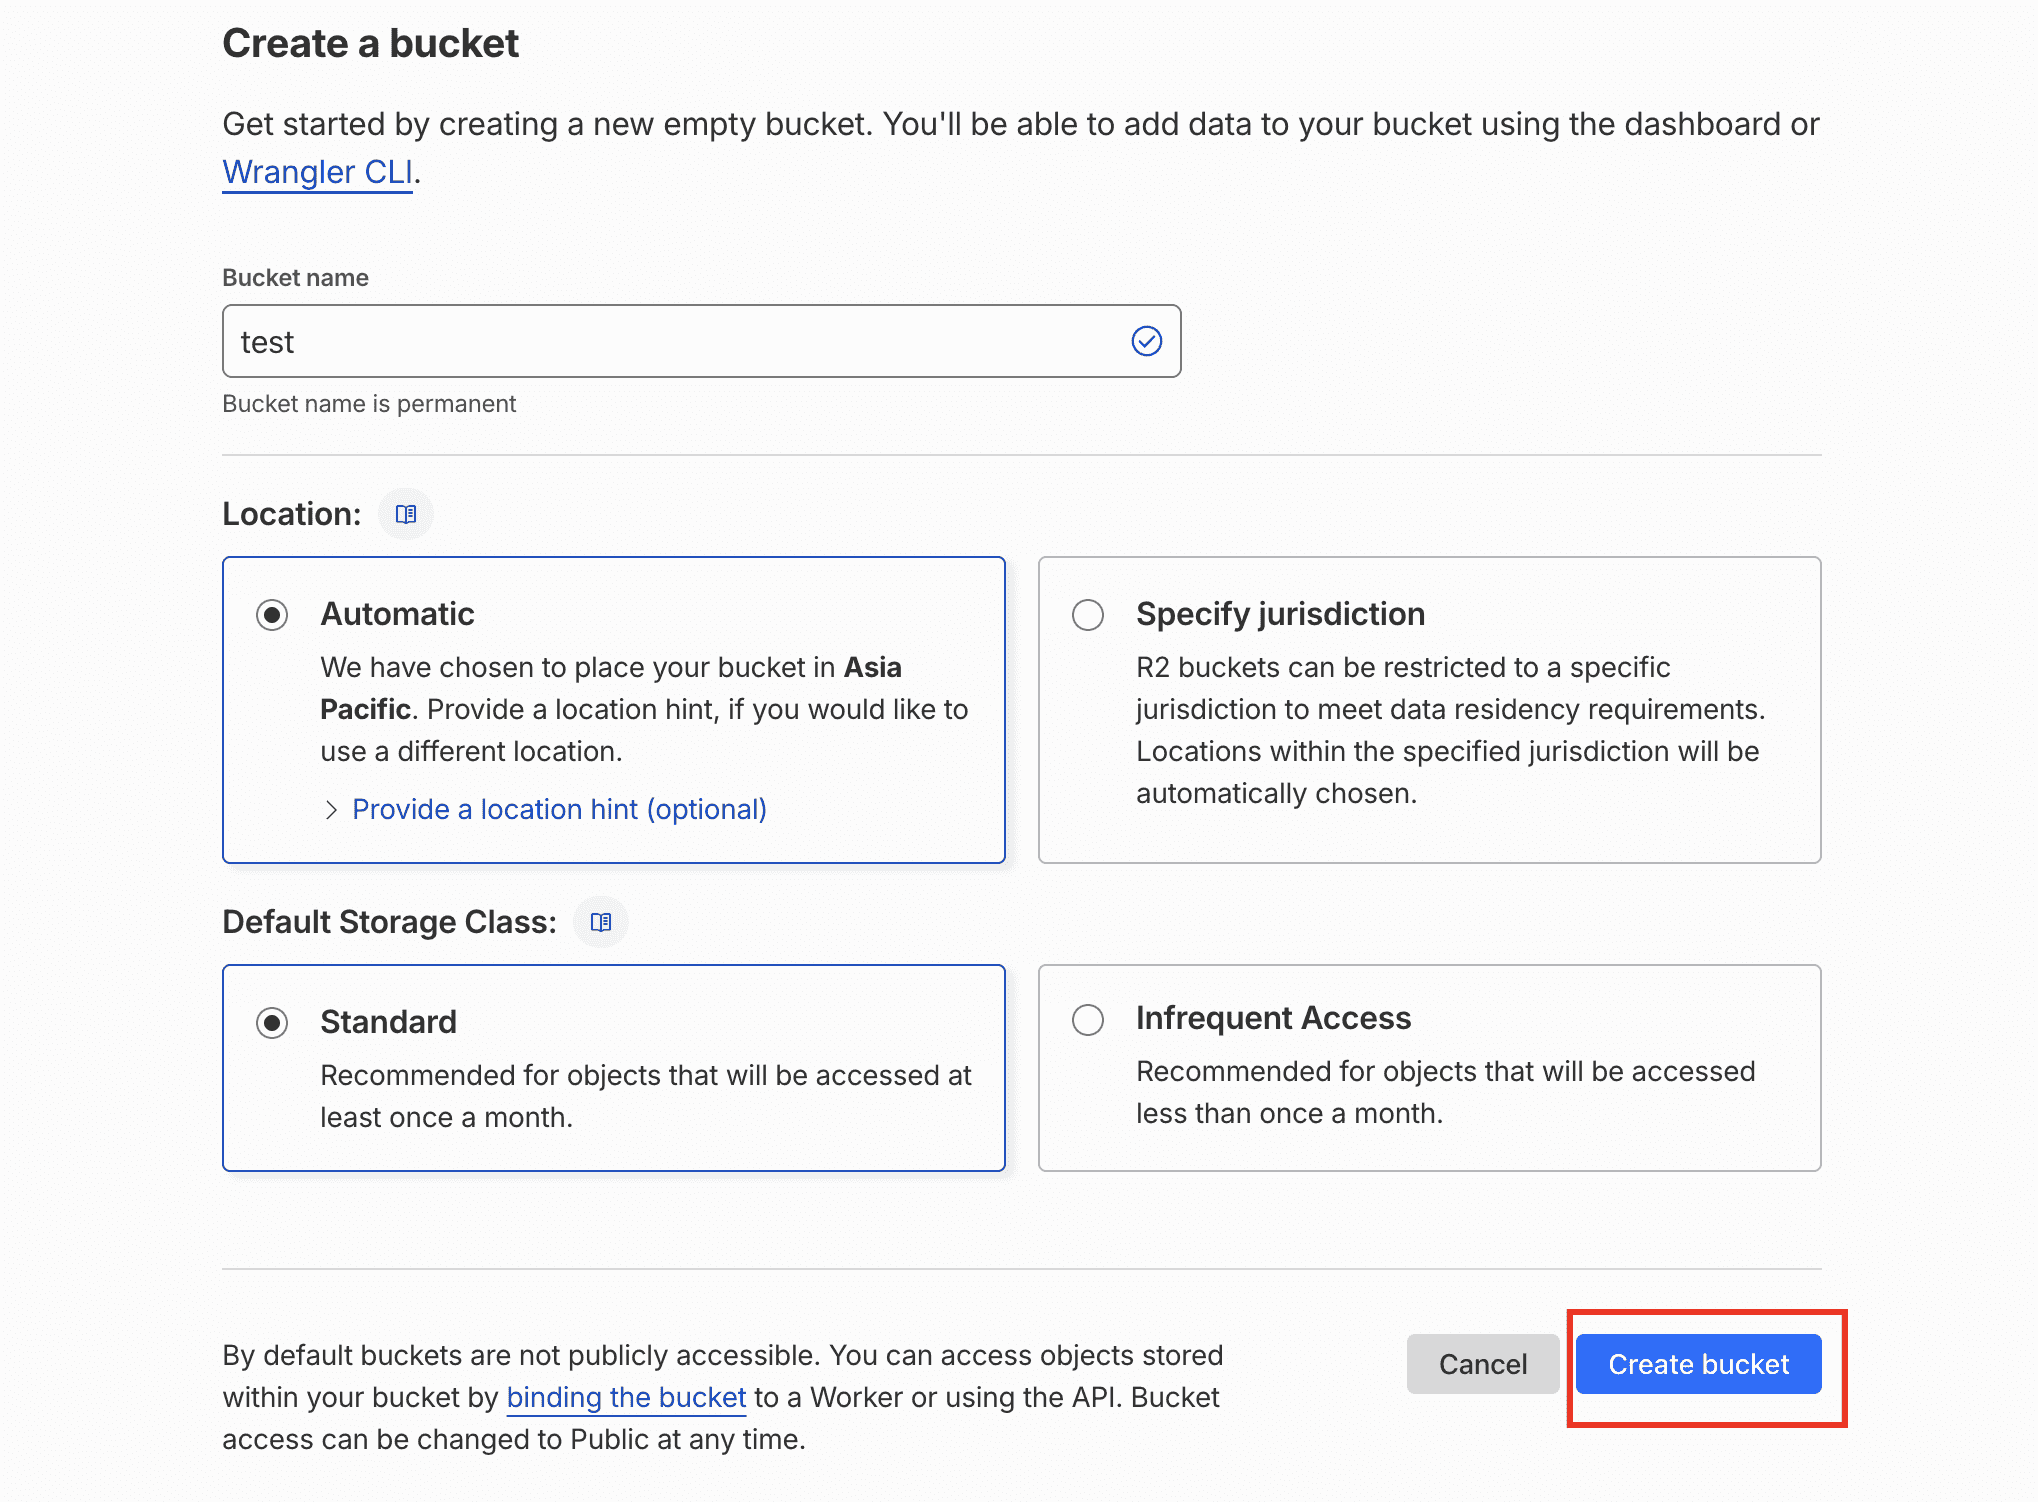
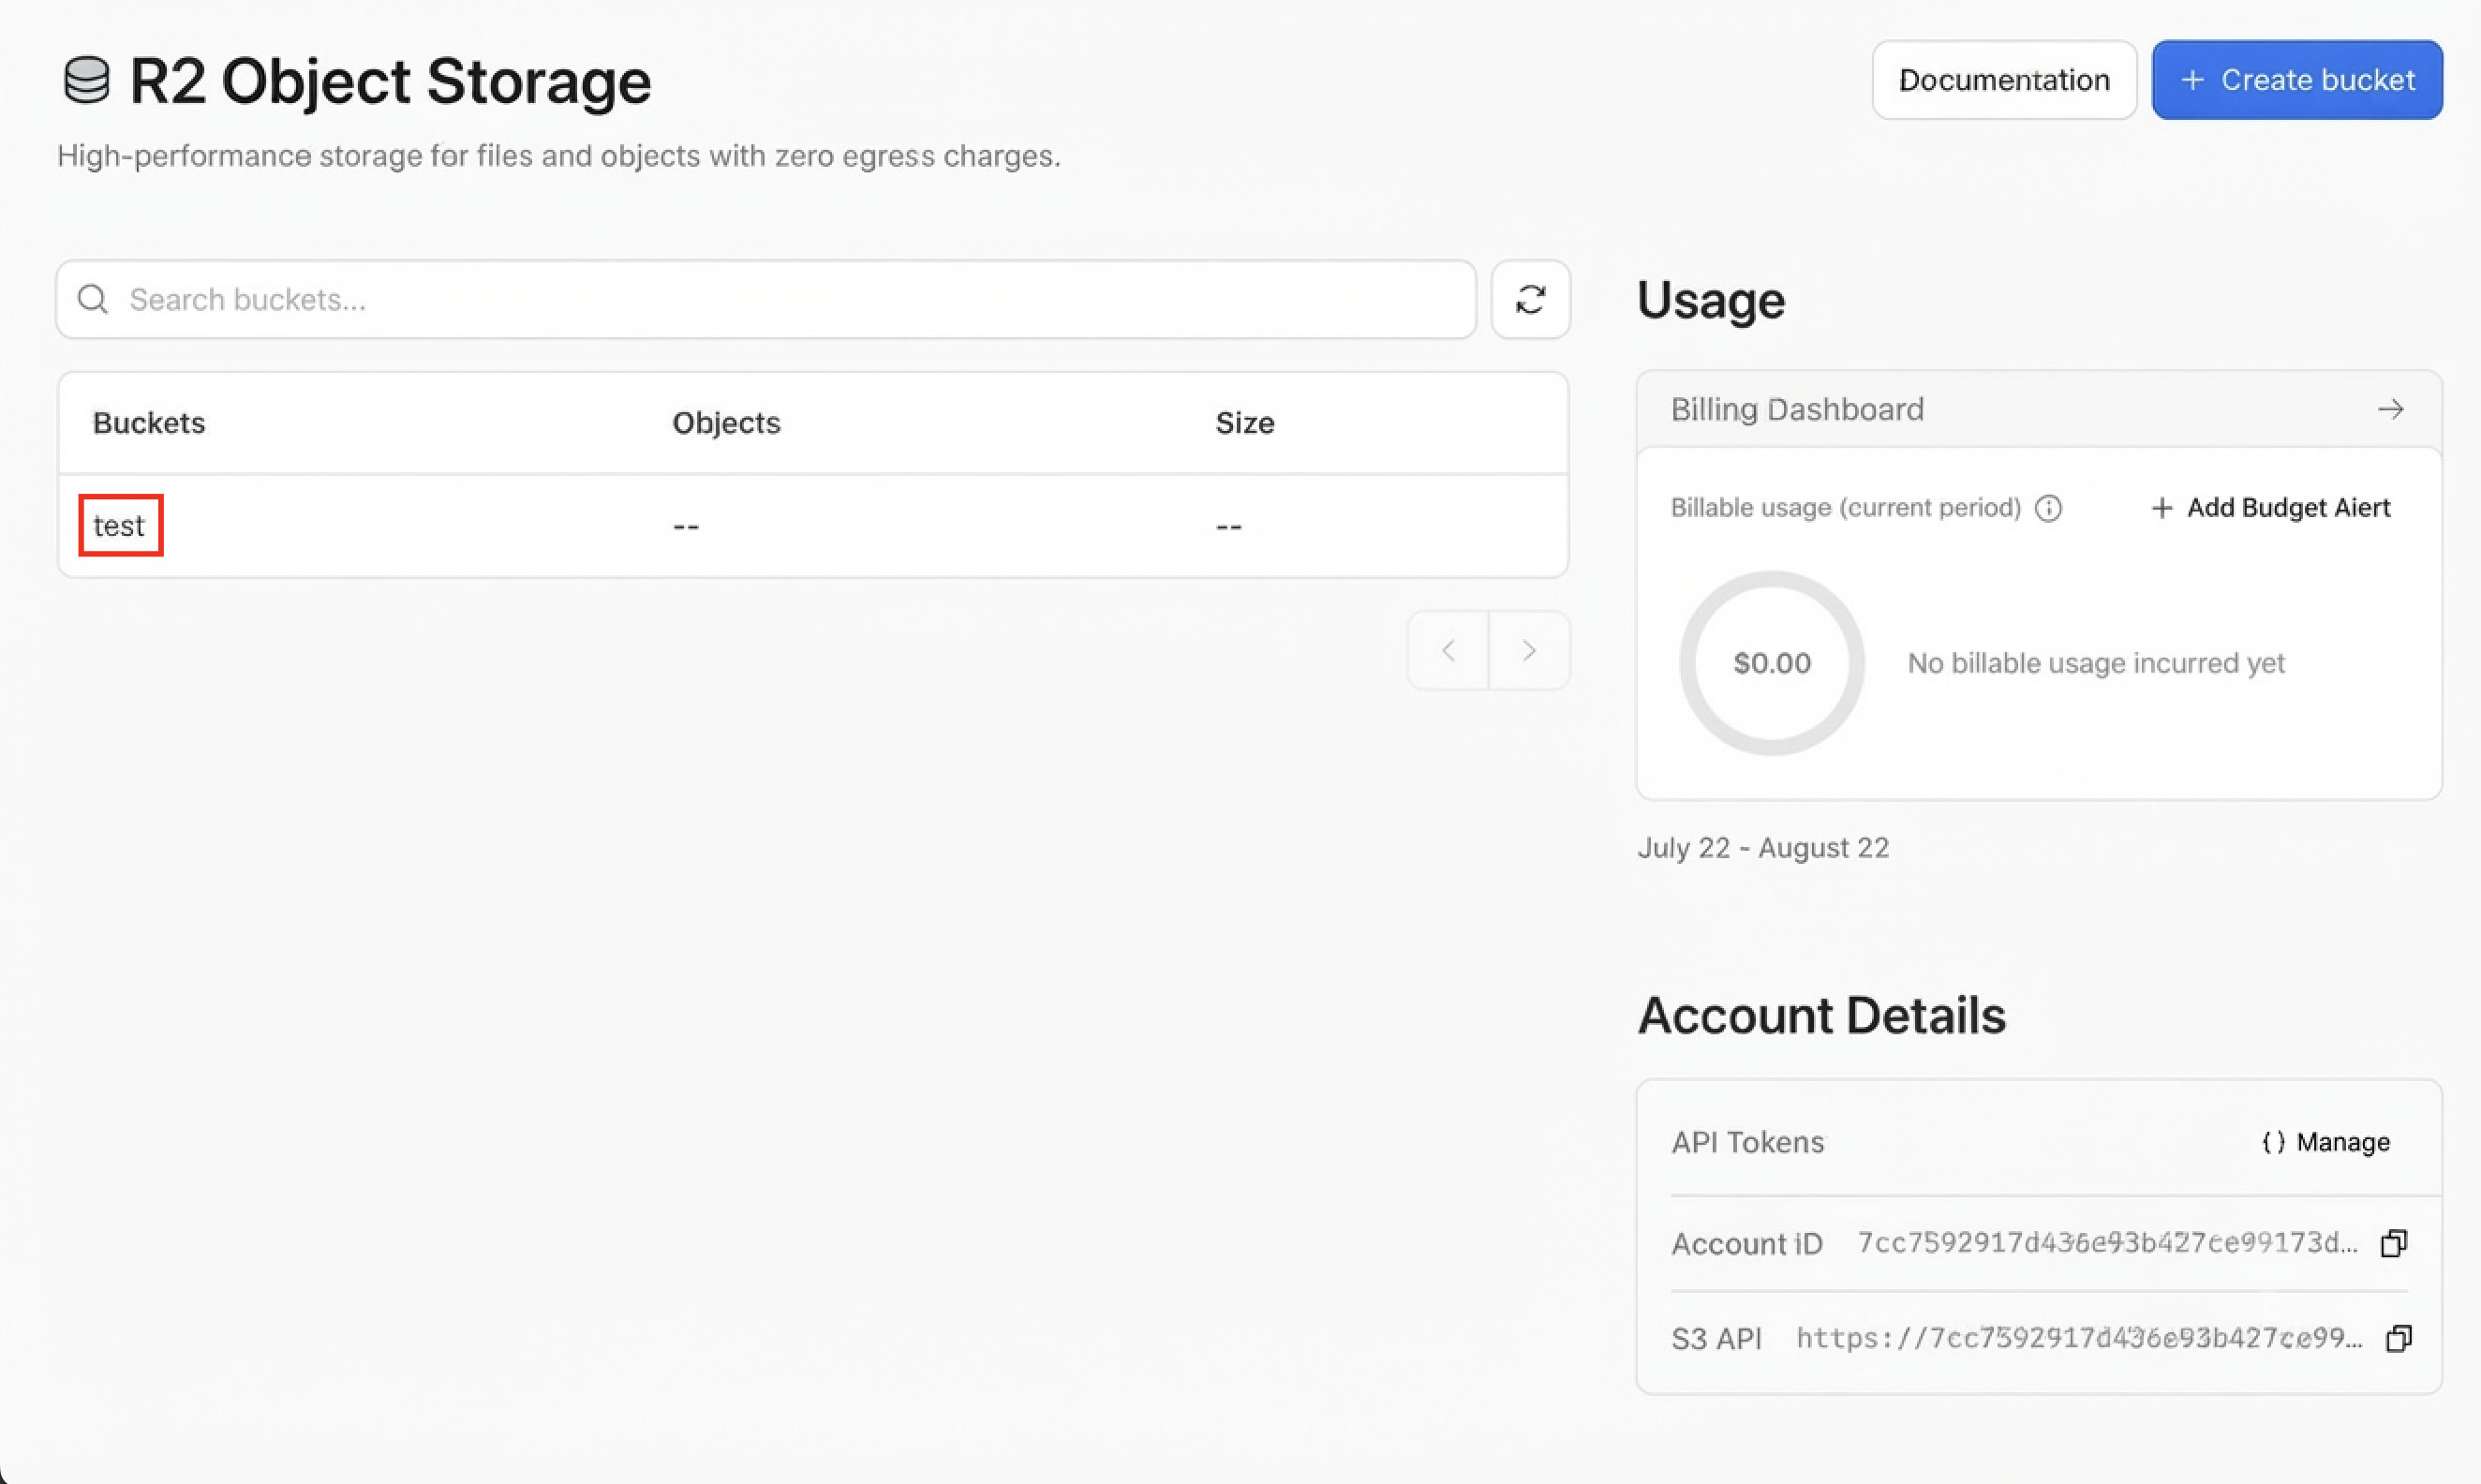
In the Cloudflare dashboard, open R2 and create a bucket (or use an existing one). Note its exact name — you'll need it in Ink Player.
Step 2 — Get your Account ID and an API token
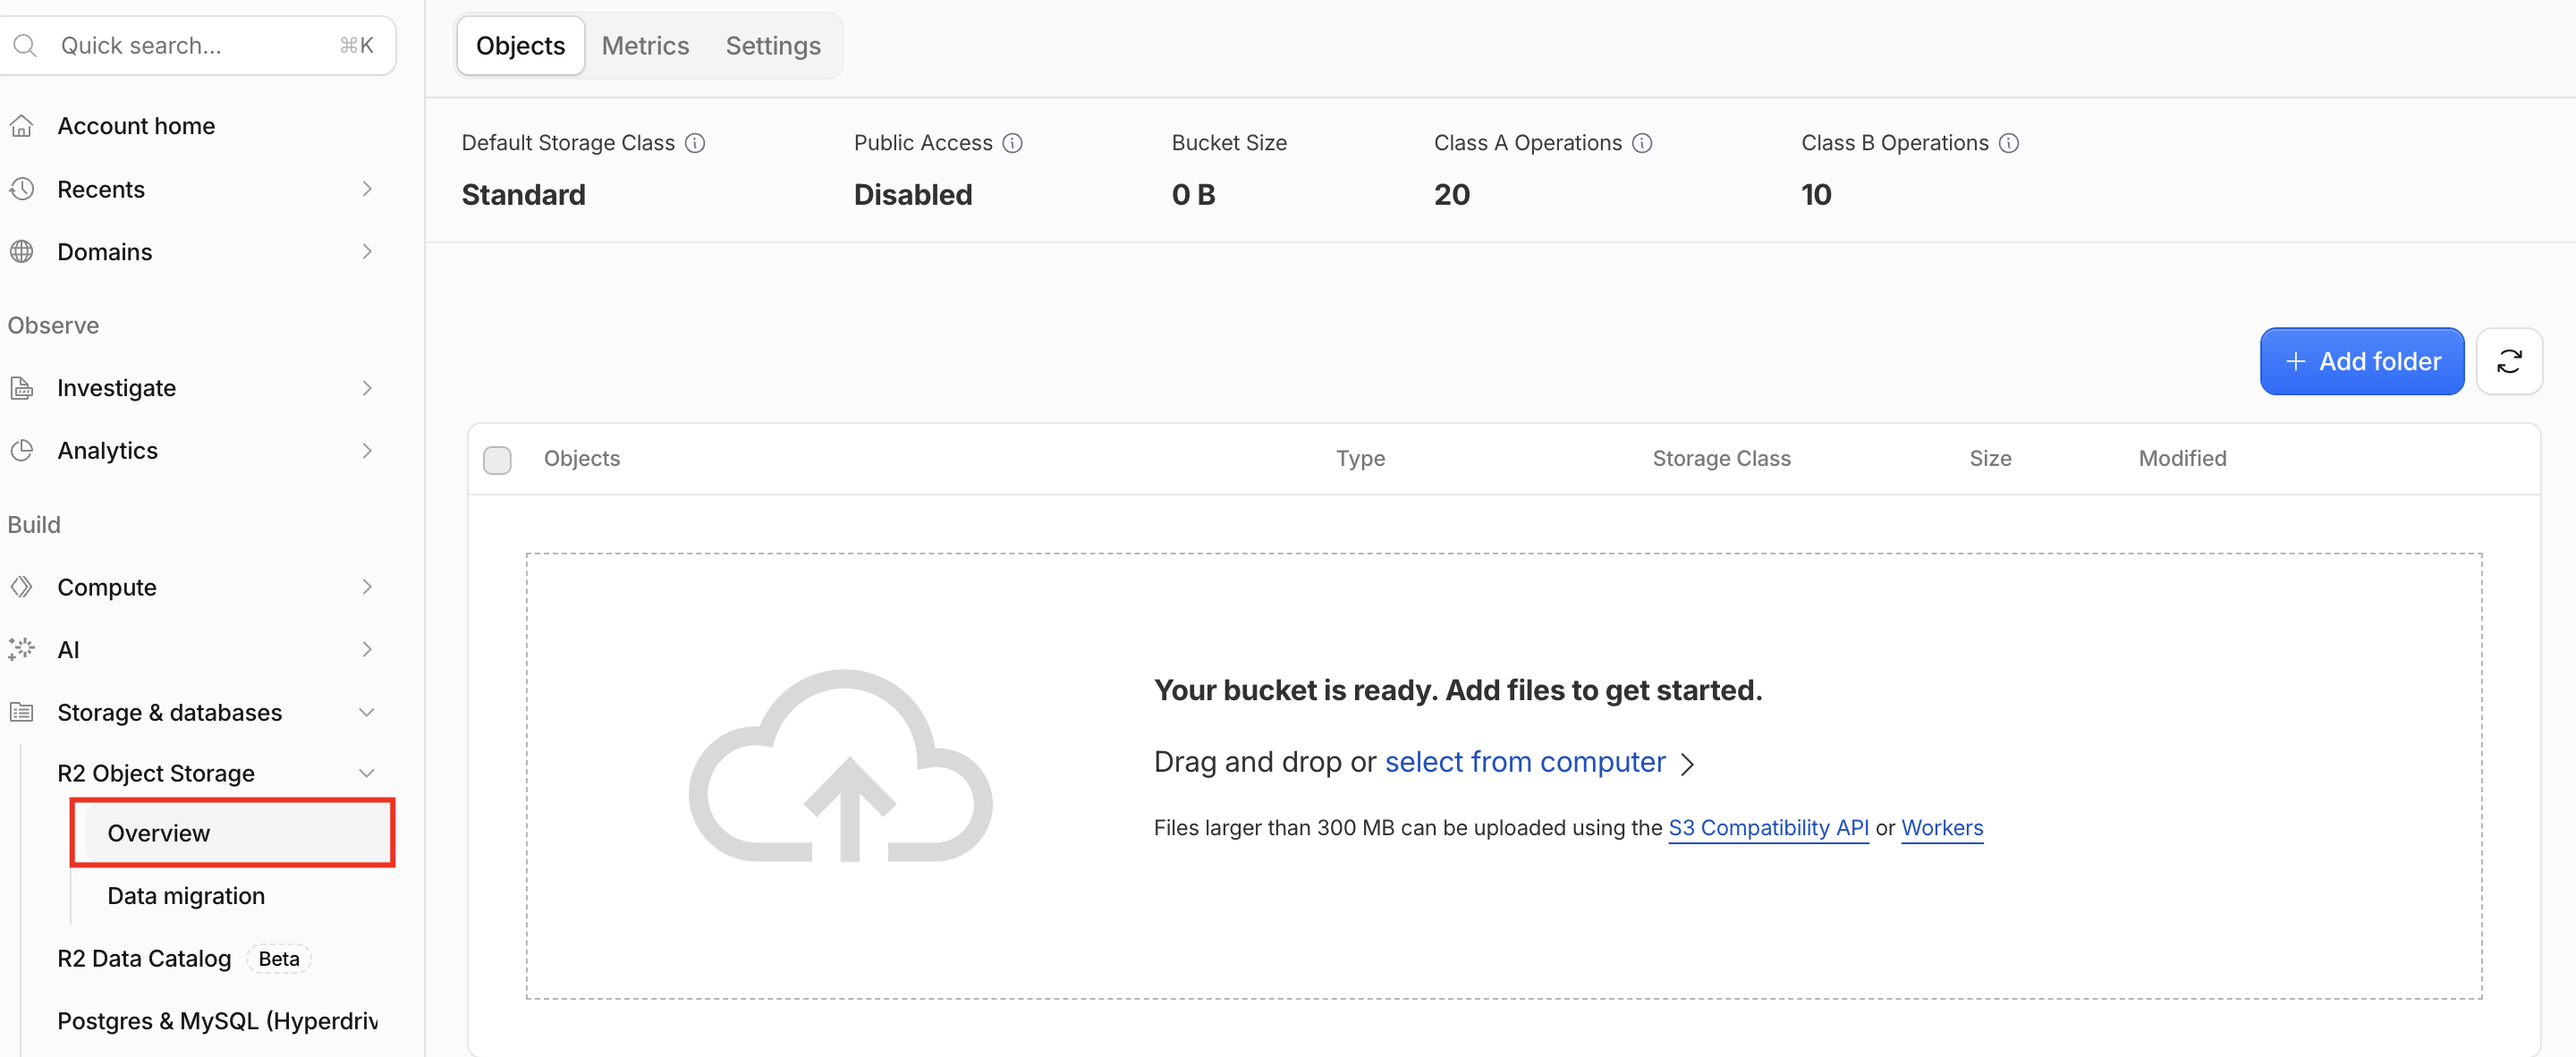
- Open R2 → Overview. Note your Account ID (right sidebar, under Account Details), then click Manage next to API Tokens.
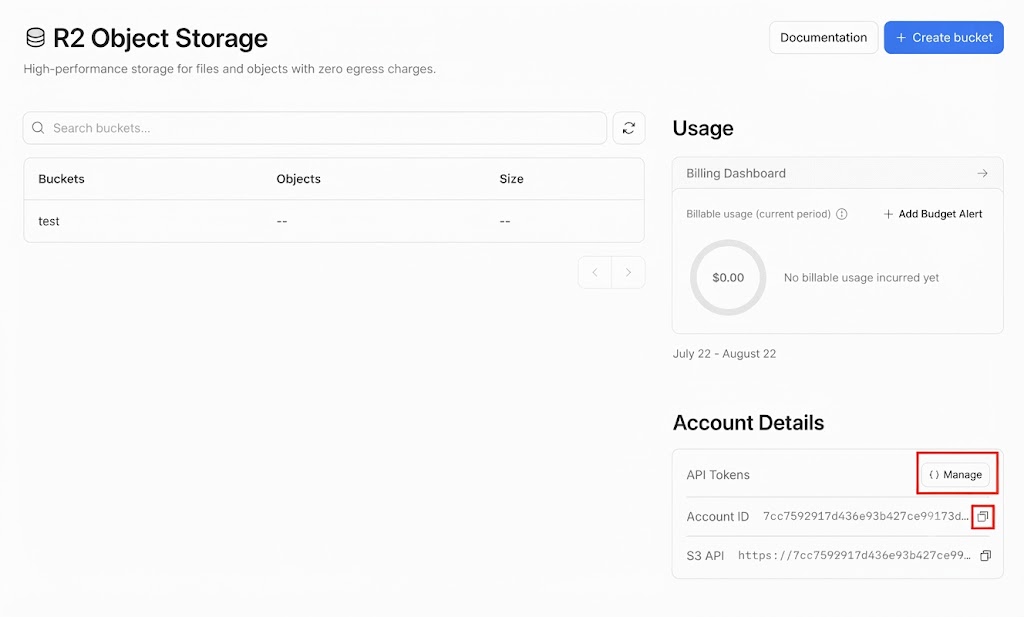
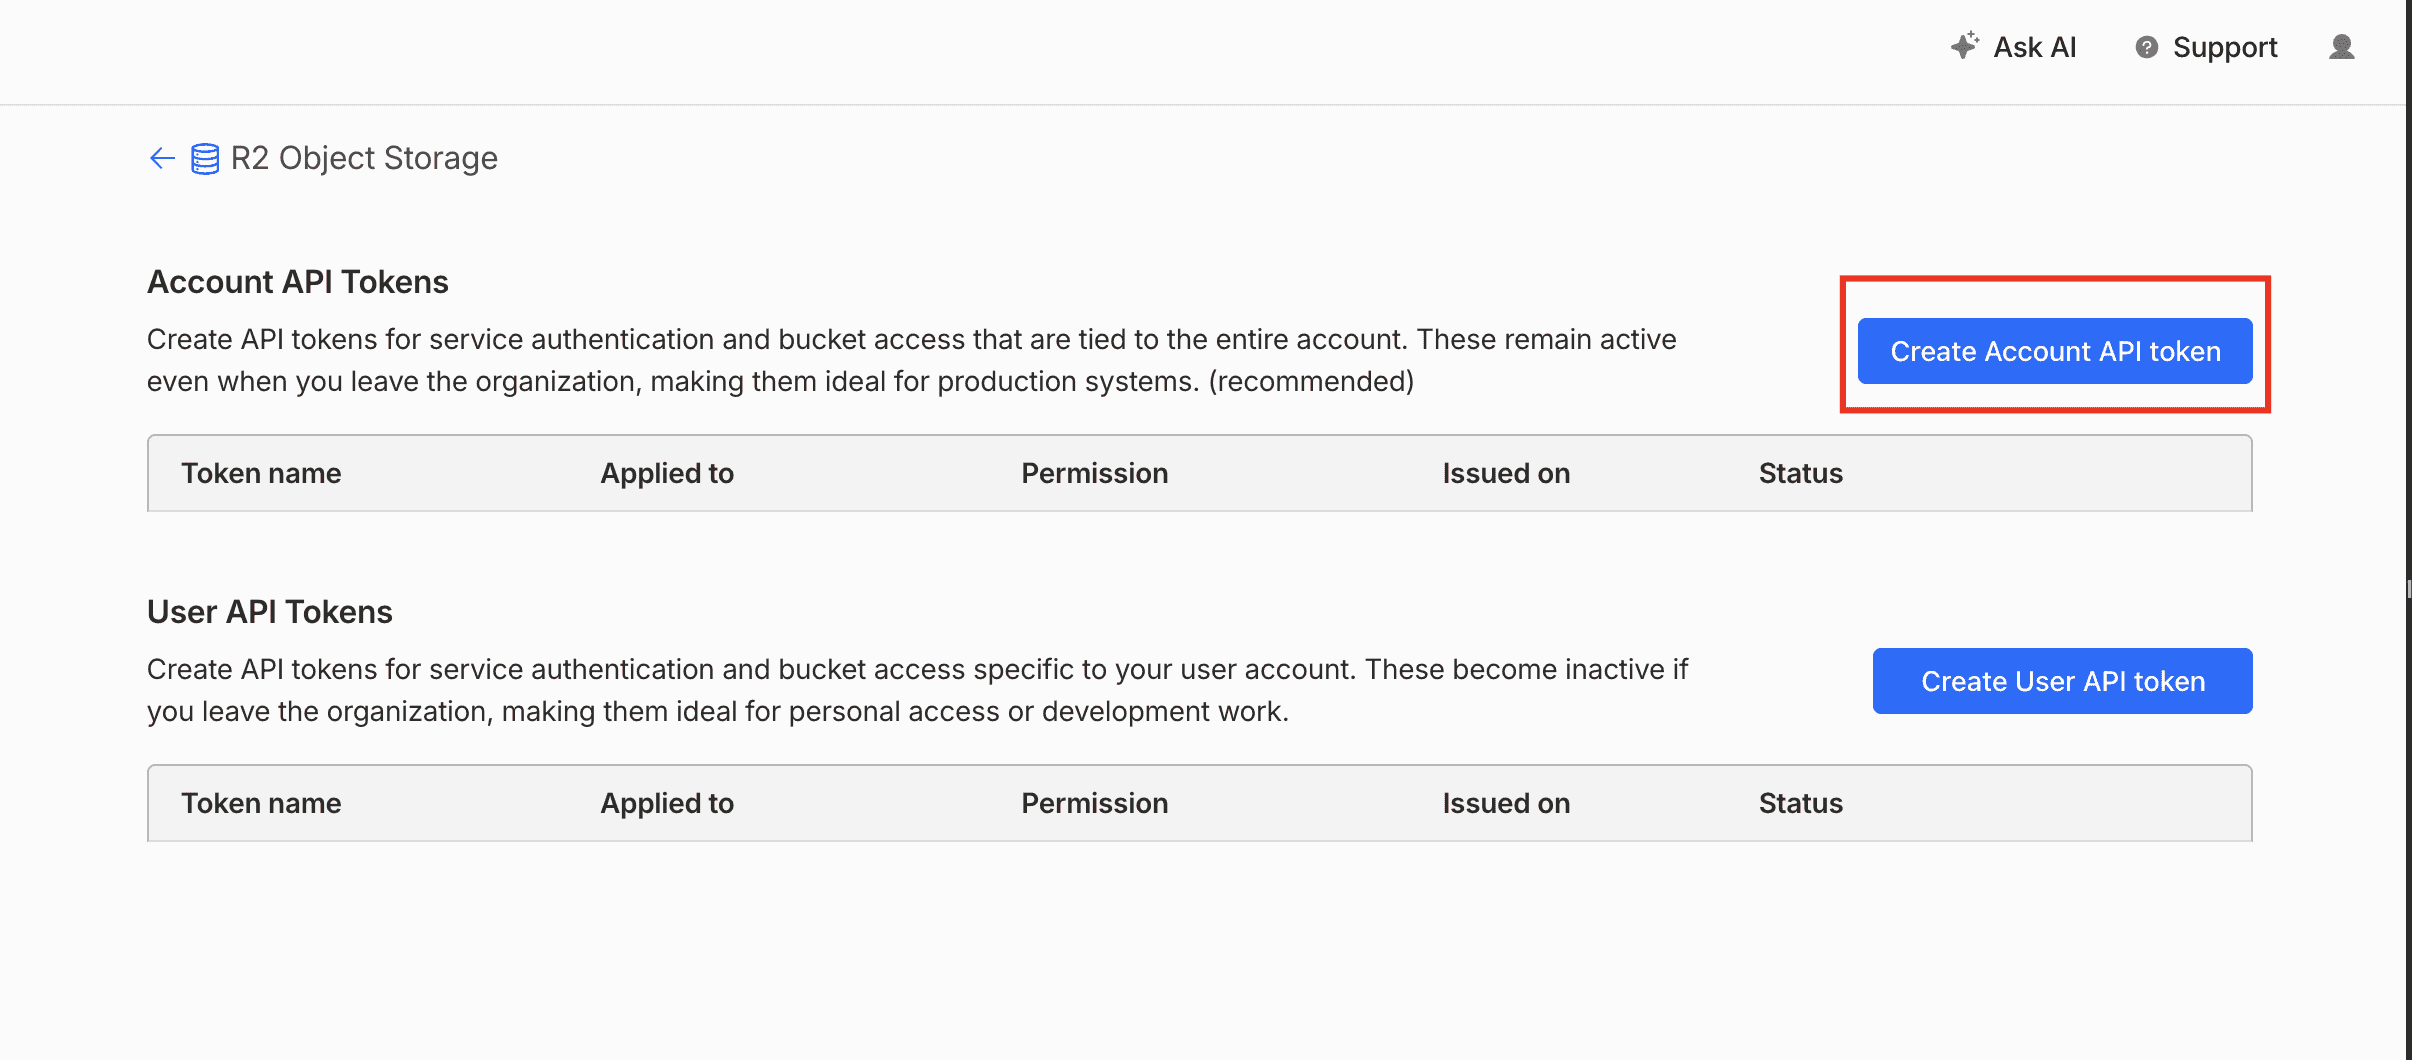
- Click Create Account API token.
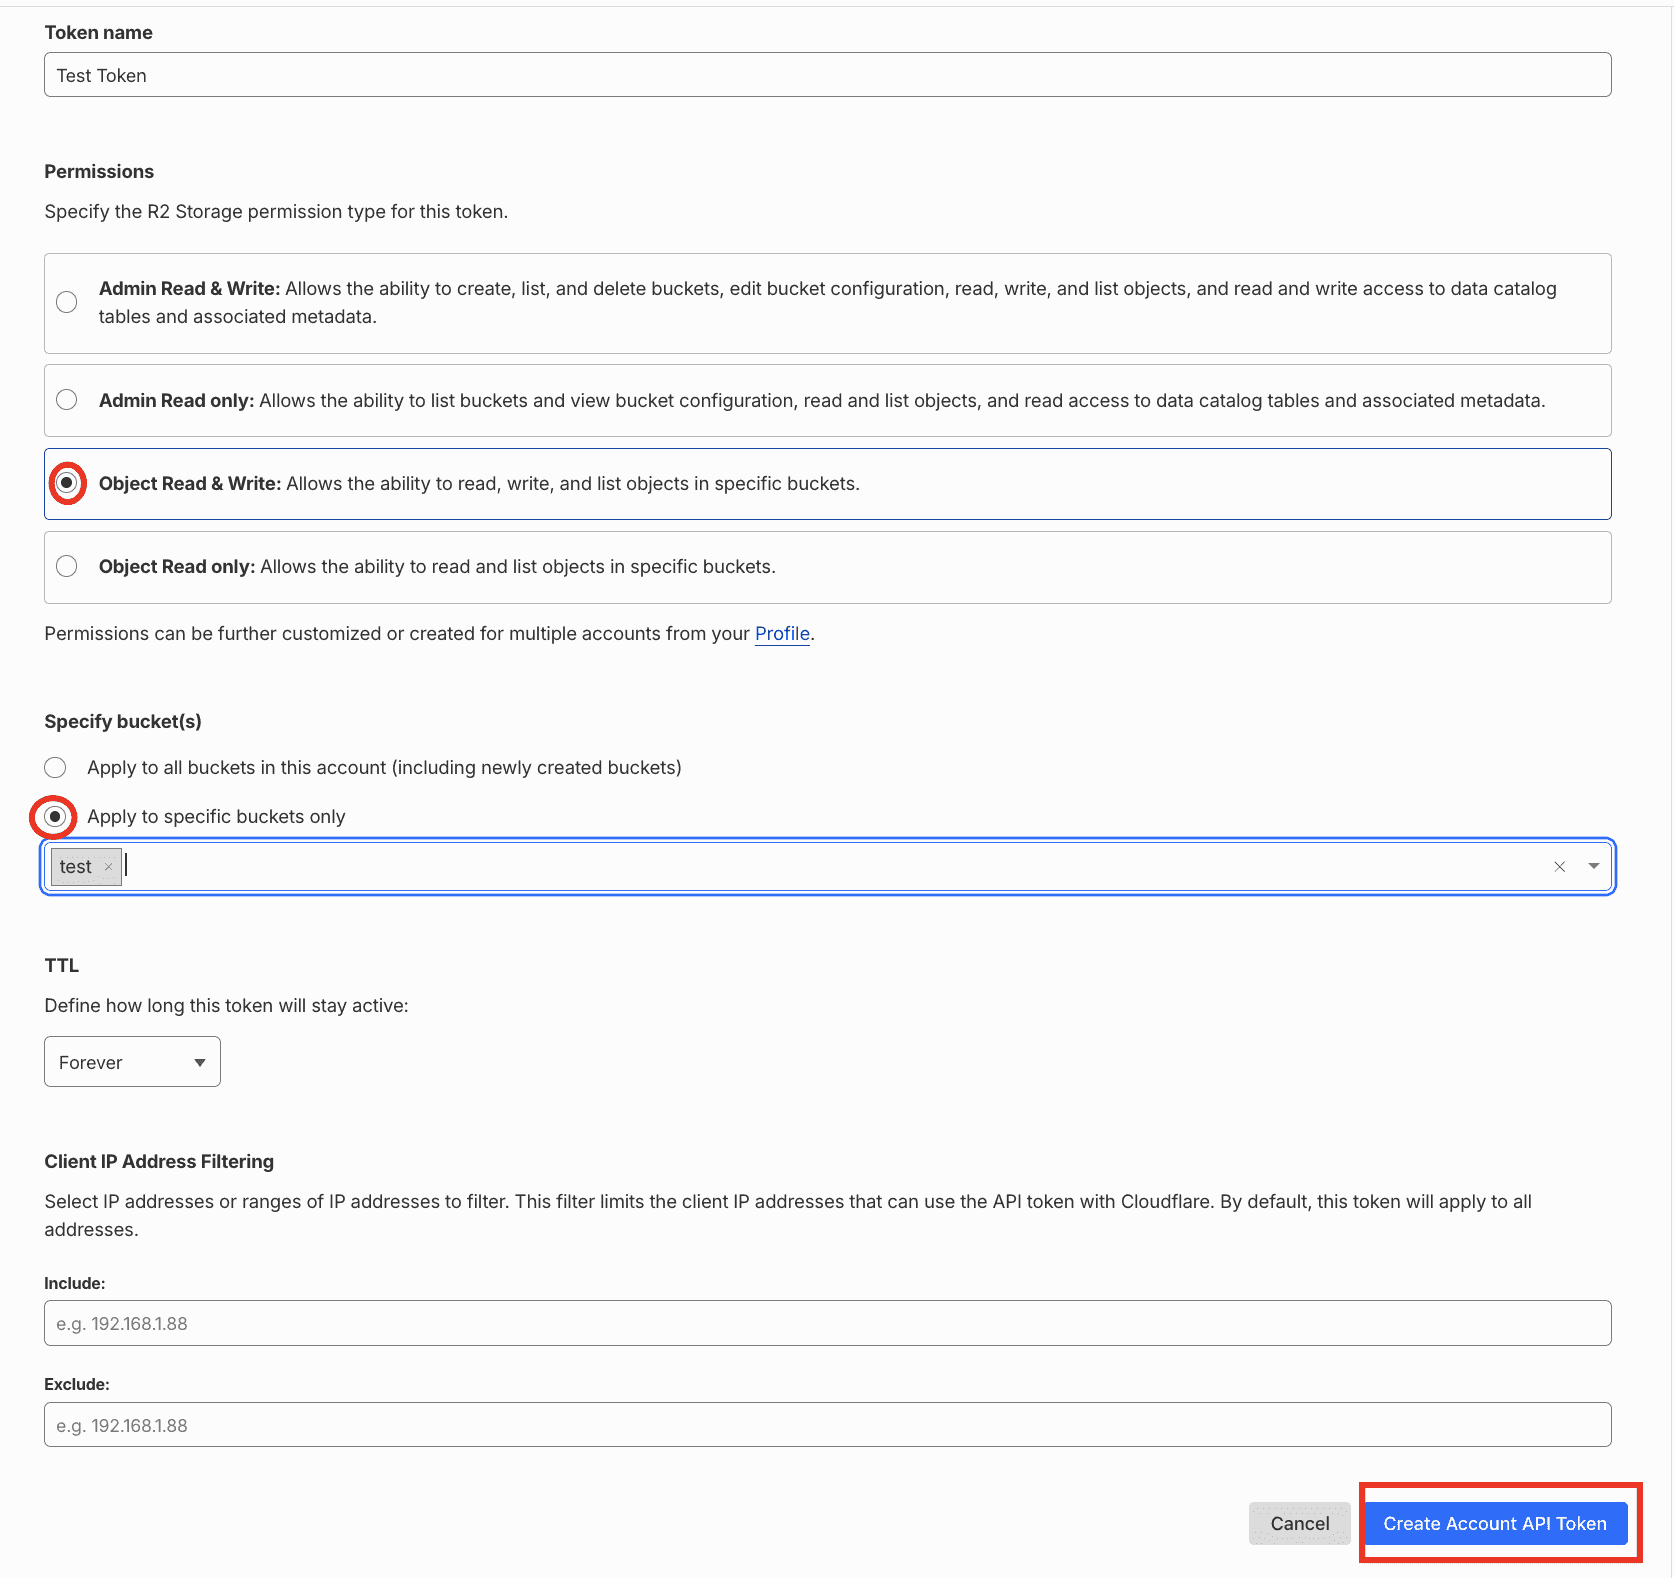
- Name the token, choose Object Read & Write, and apply it to your bucket — Read-only tokens can browse but can't upload or delete. Click Create Account API Token.
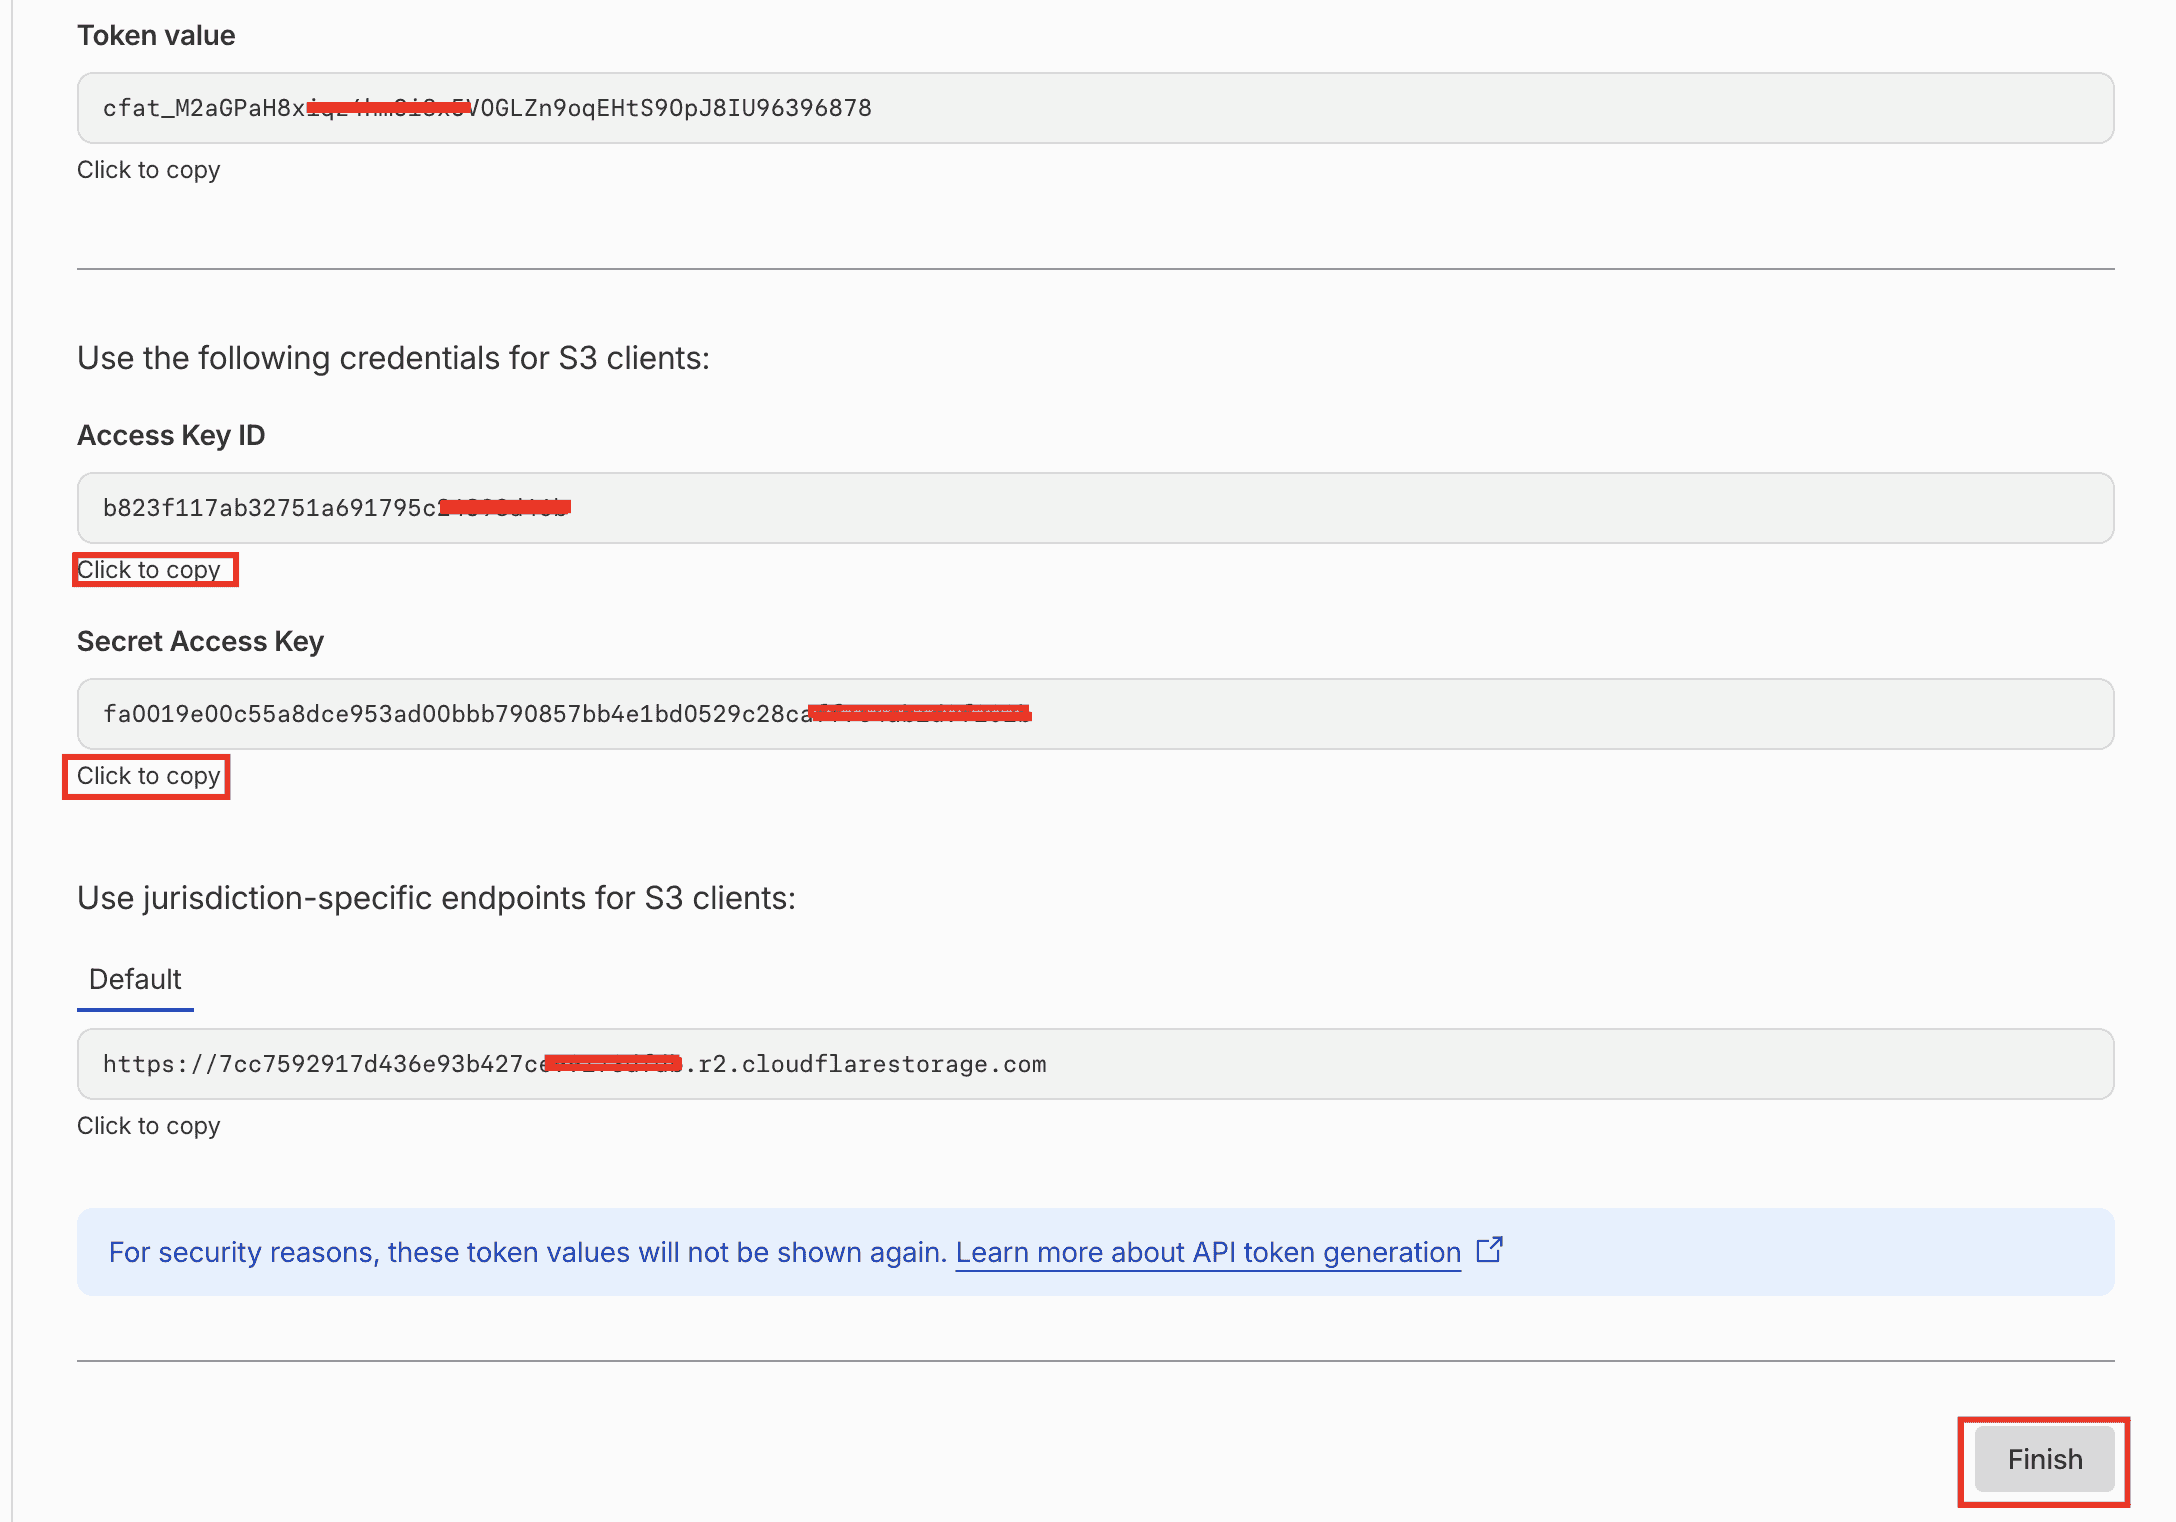
- Copy the Access Key ID and Secret Access Key — the secret is shown only once.
Step 3 — Set up public delivery (for public videos)
Public videos are served from a Public URL — either an r2.dev development domain or a custom domain:
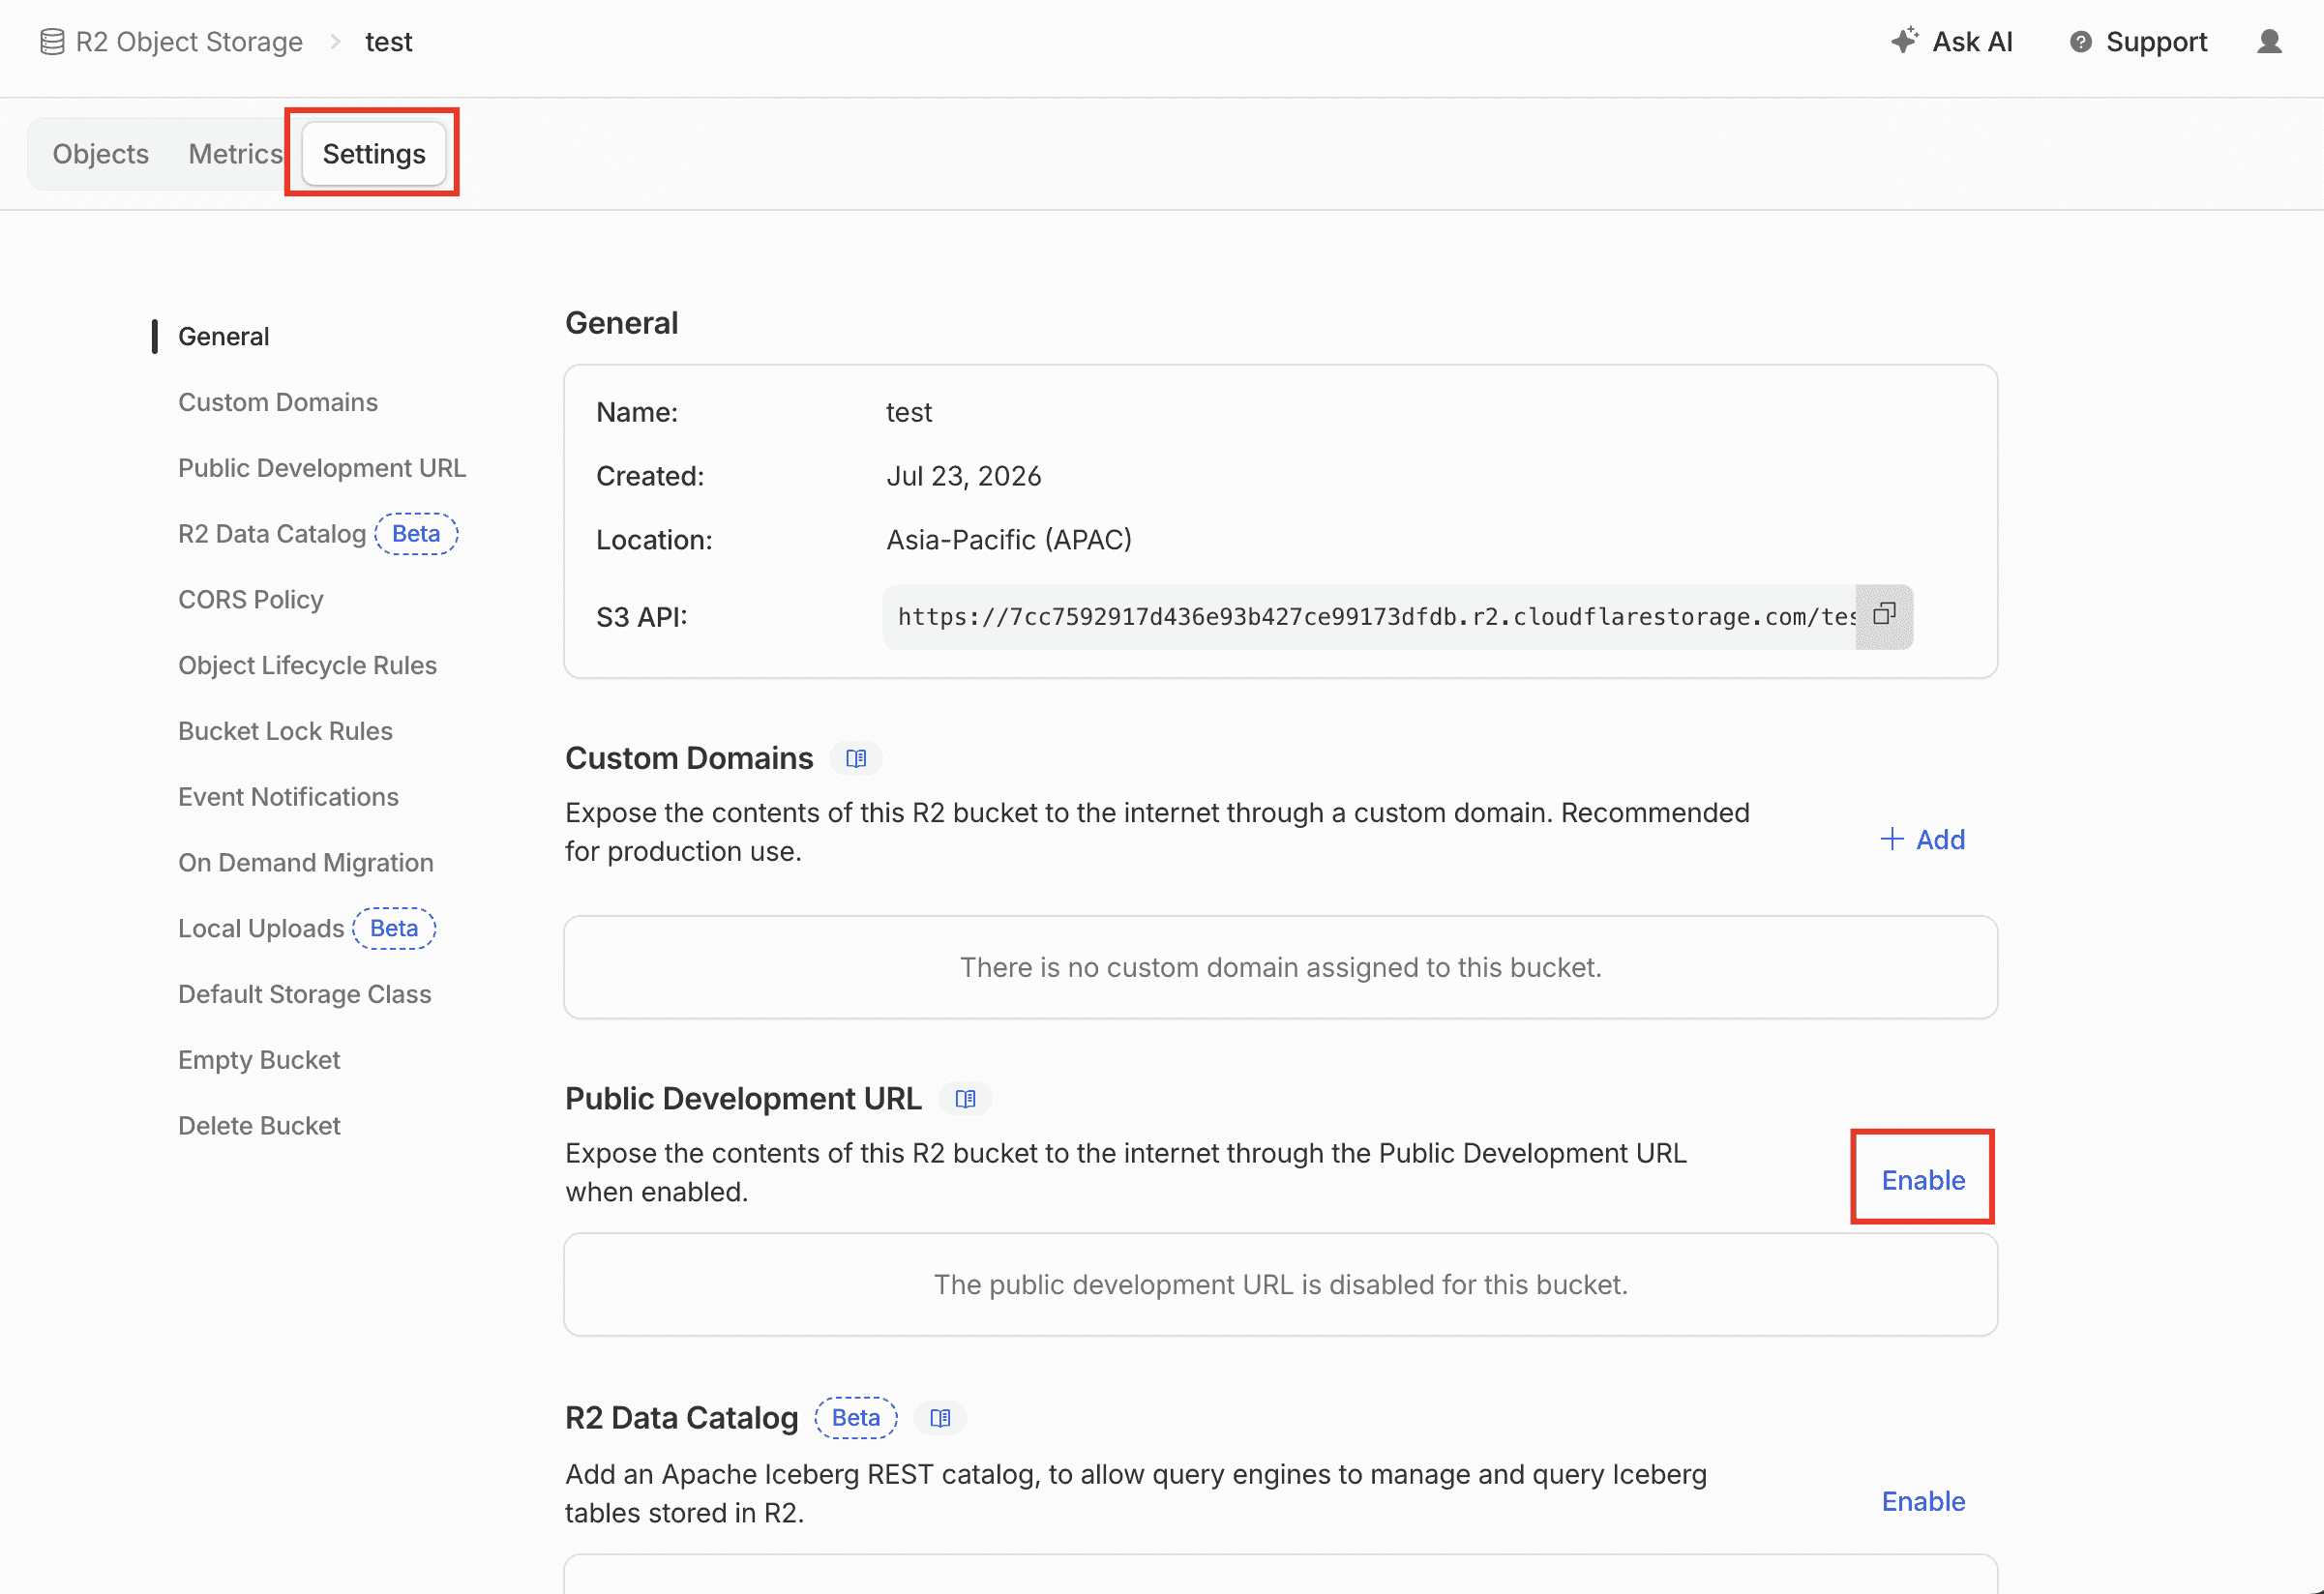
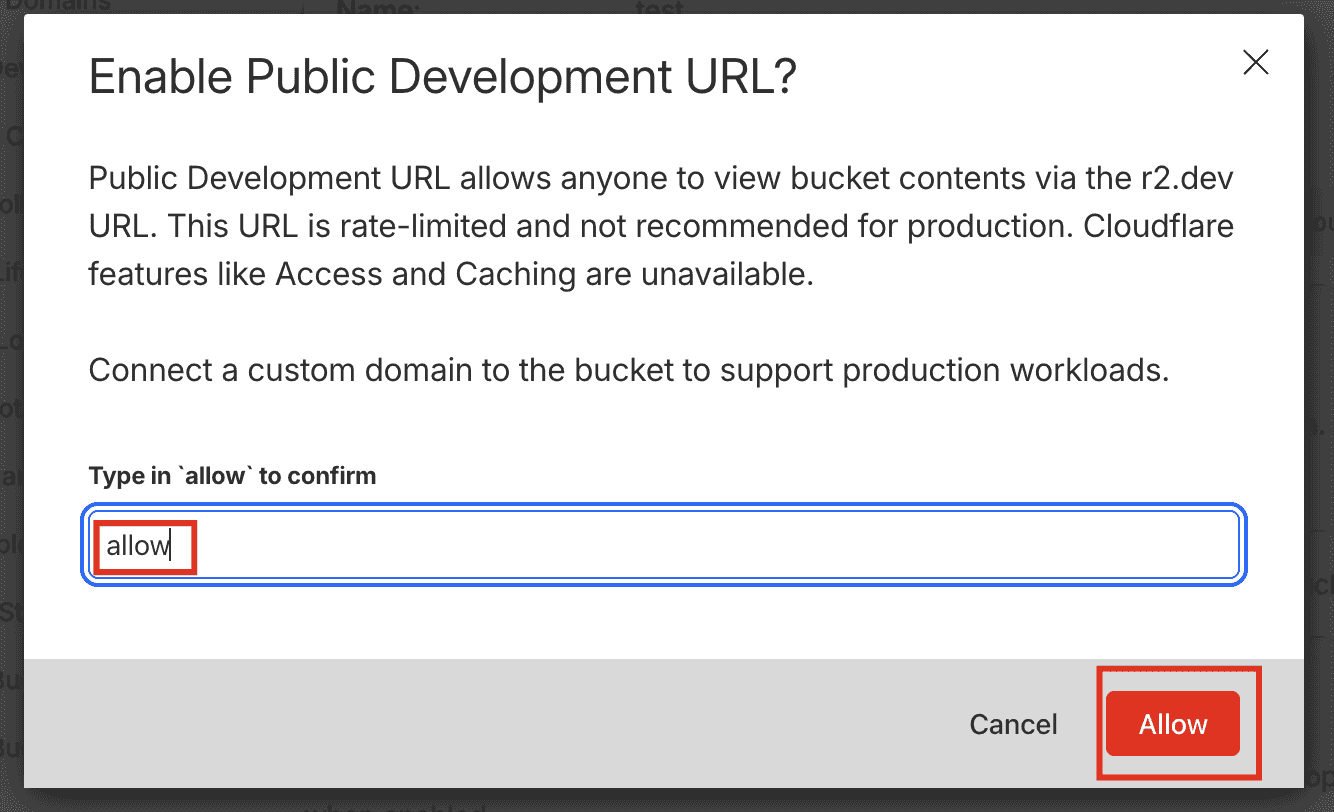
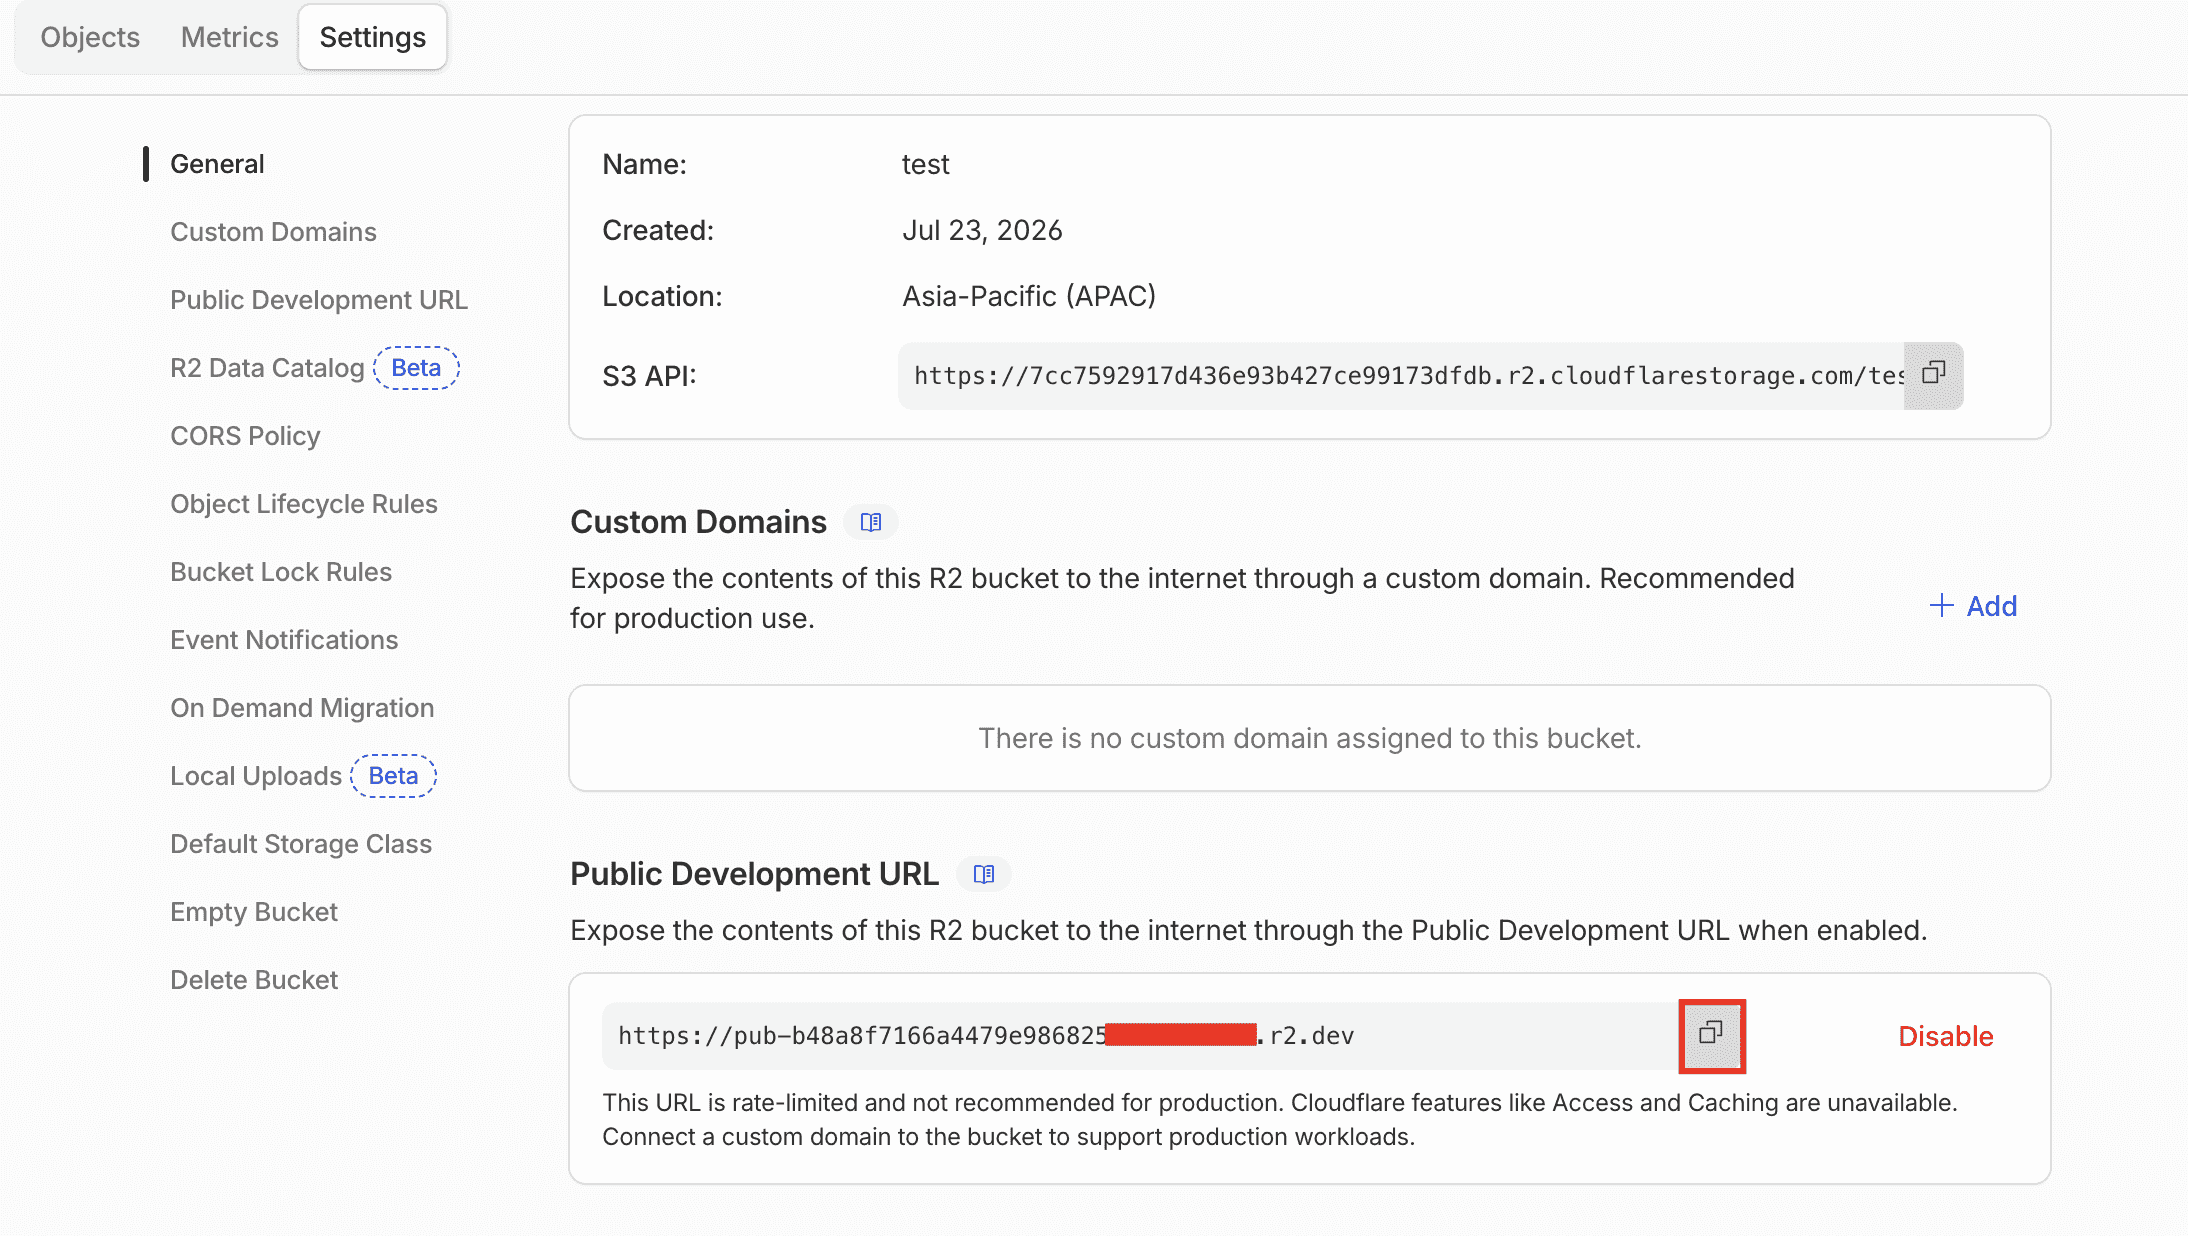
- r2.dev: open your bucket's Settings, enable Public access → r2.dev subdomain, and copy the
https://pub-xxxx.r2.devURL. - Custom domain: connect a domain under the bucket's Settings → Custom Domains and use that URL.
Skip this step if you only serve private videos — those use signed URLs and need no public domain.
Step 4 — Connect Cloudflare R2 in Ink Player
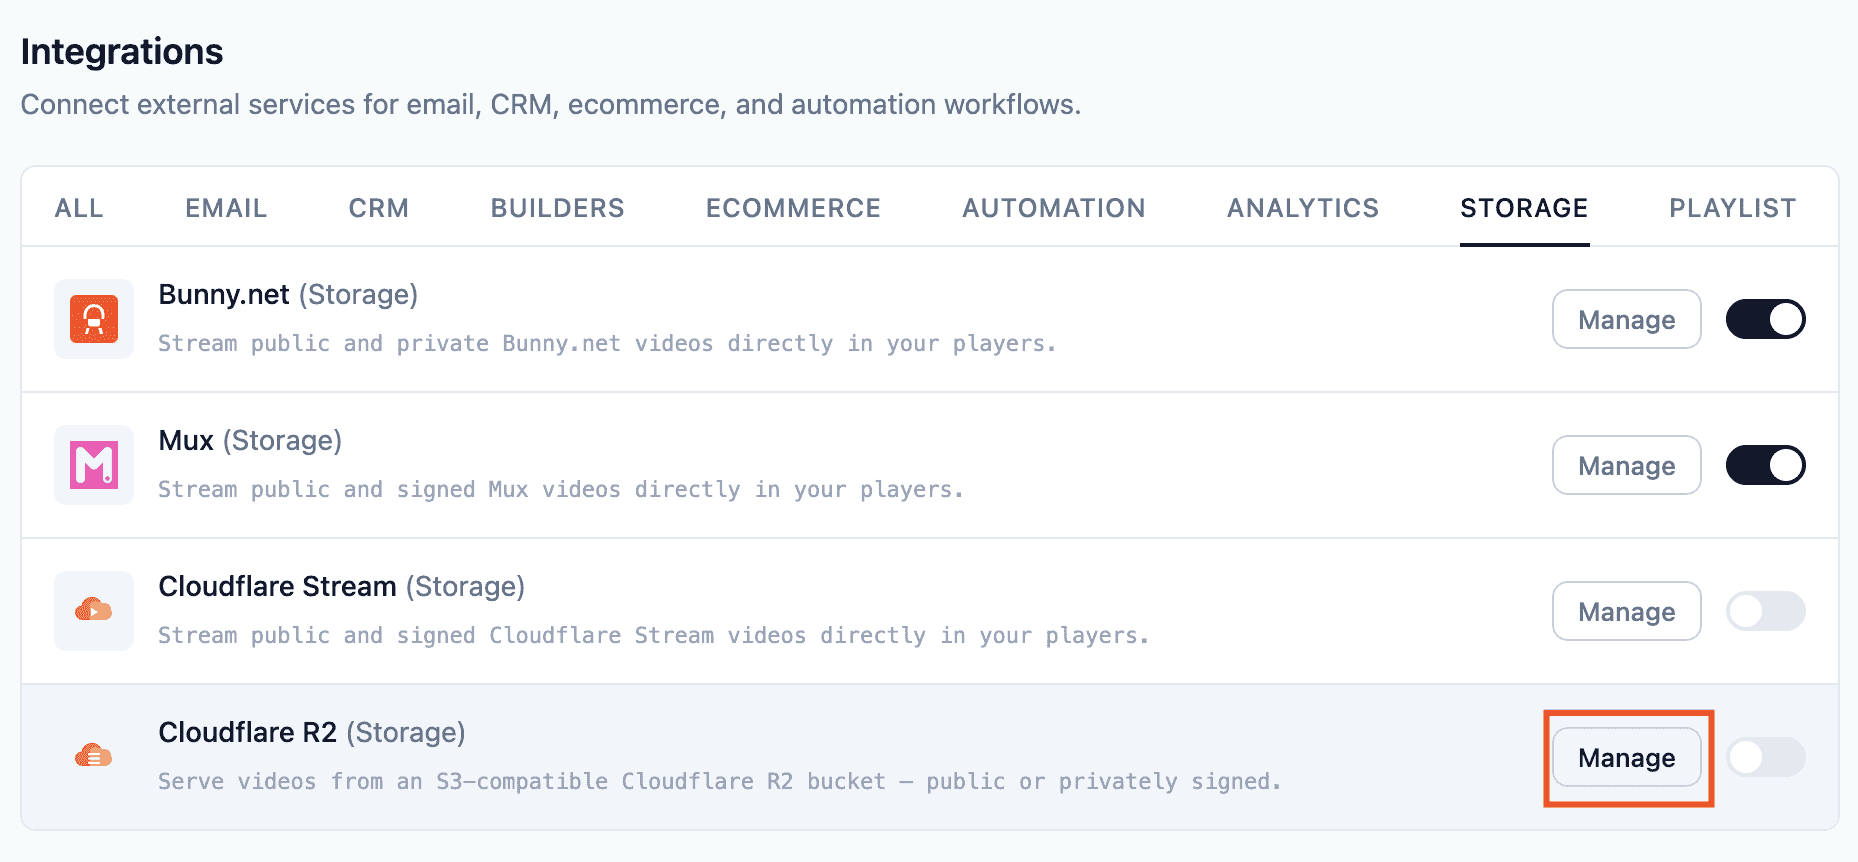
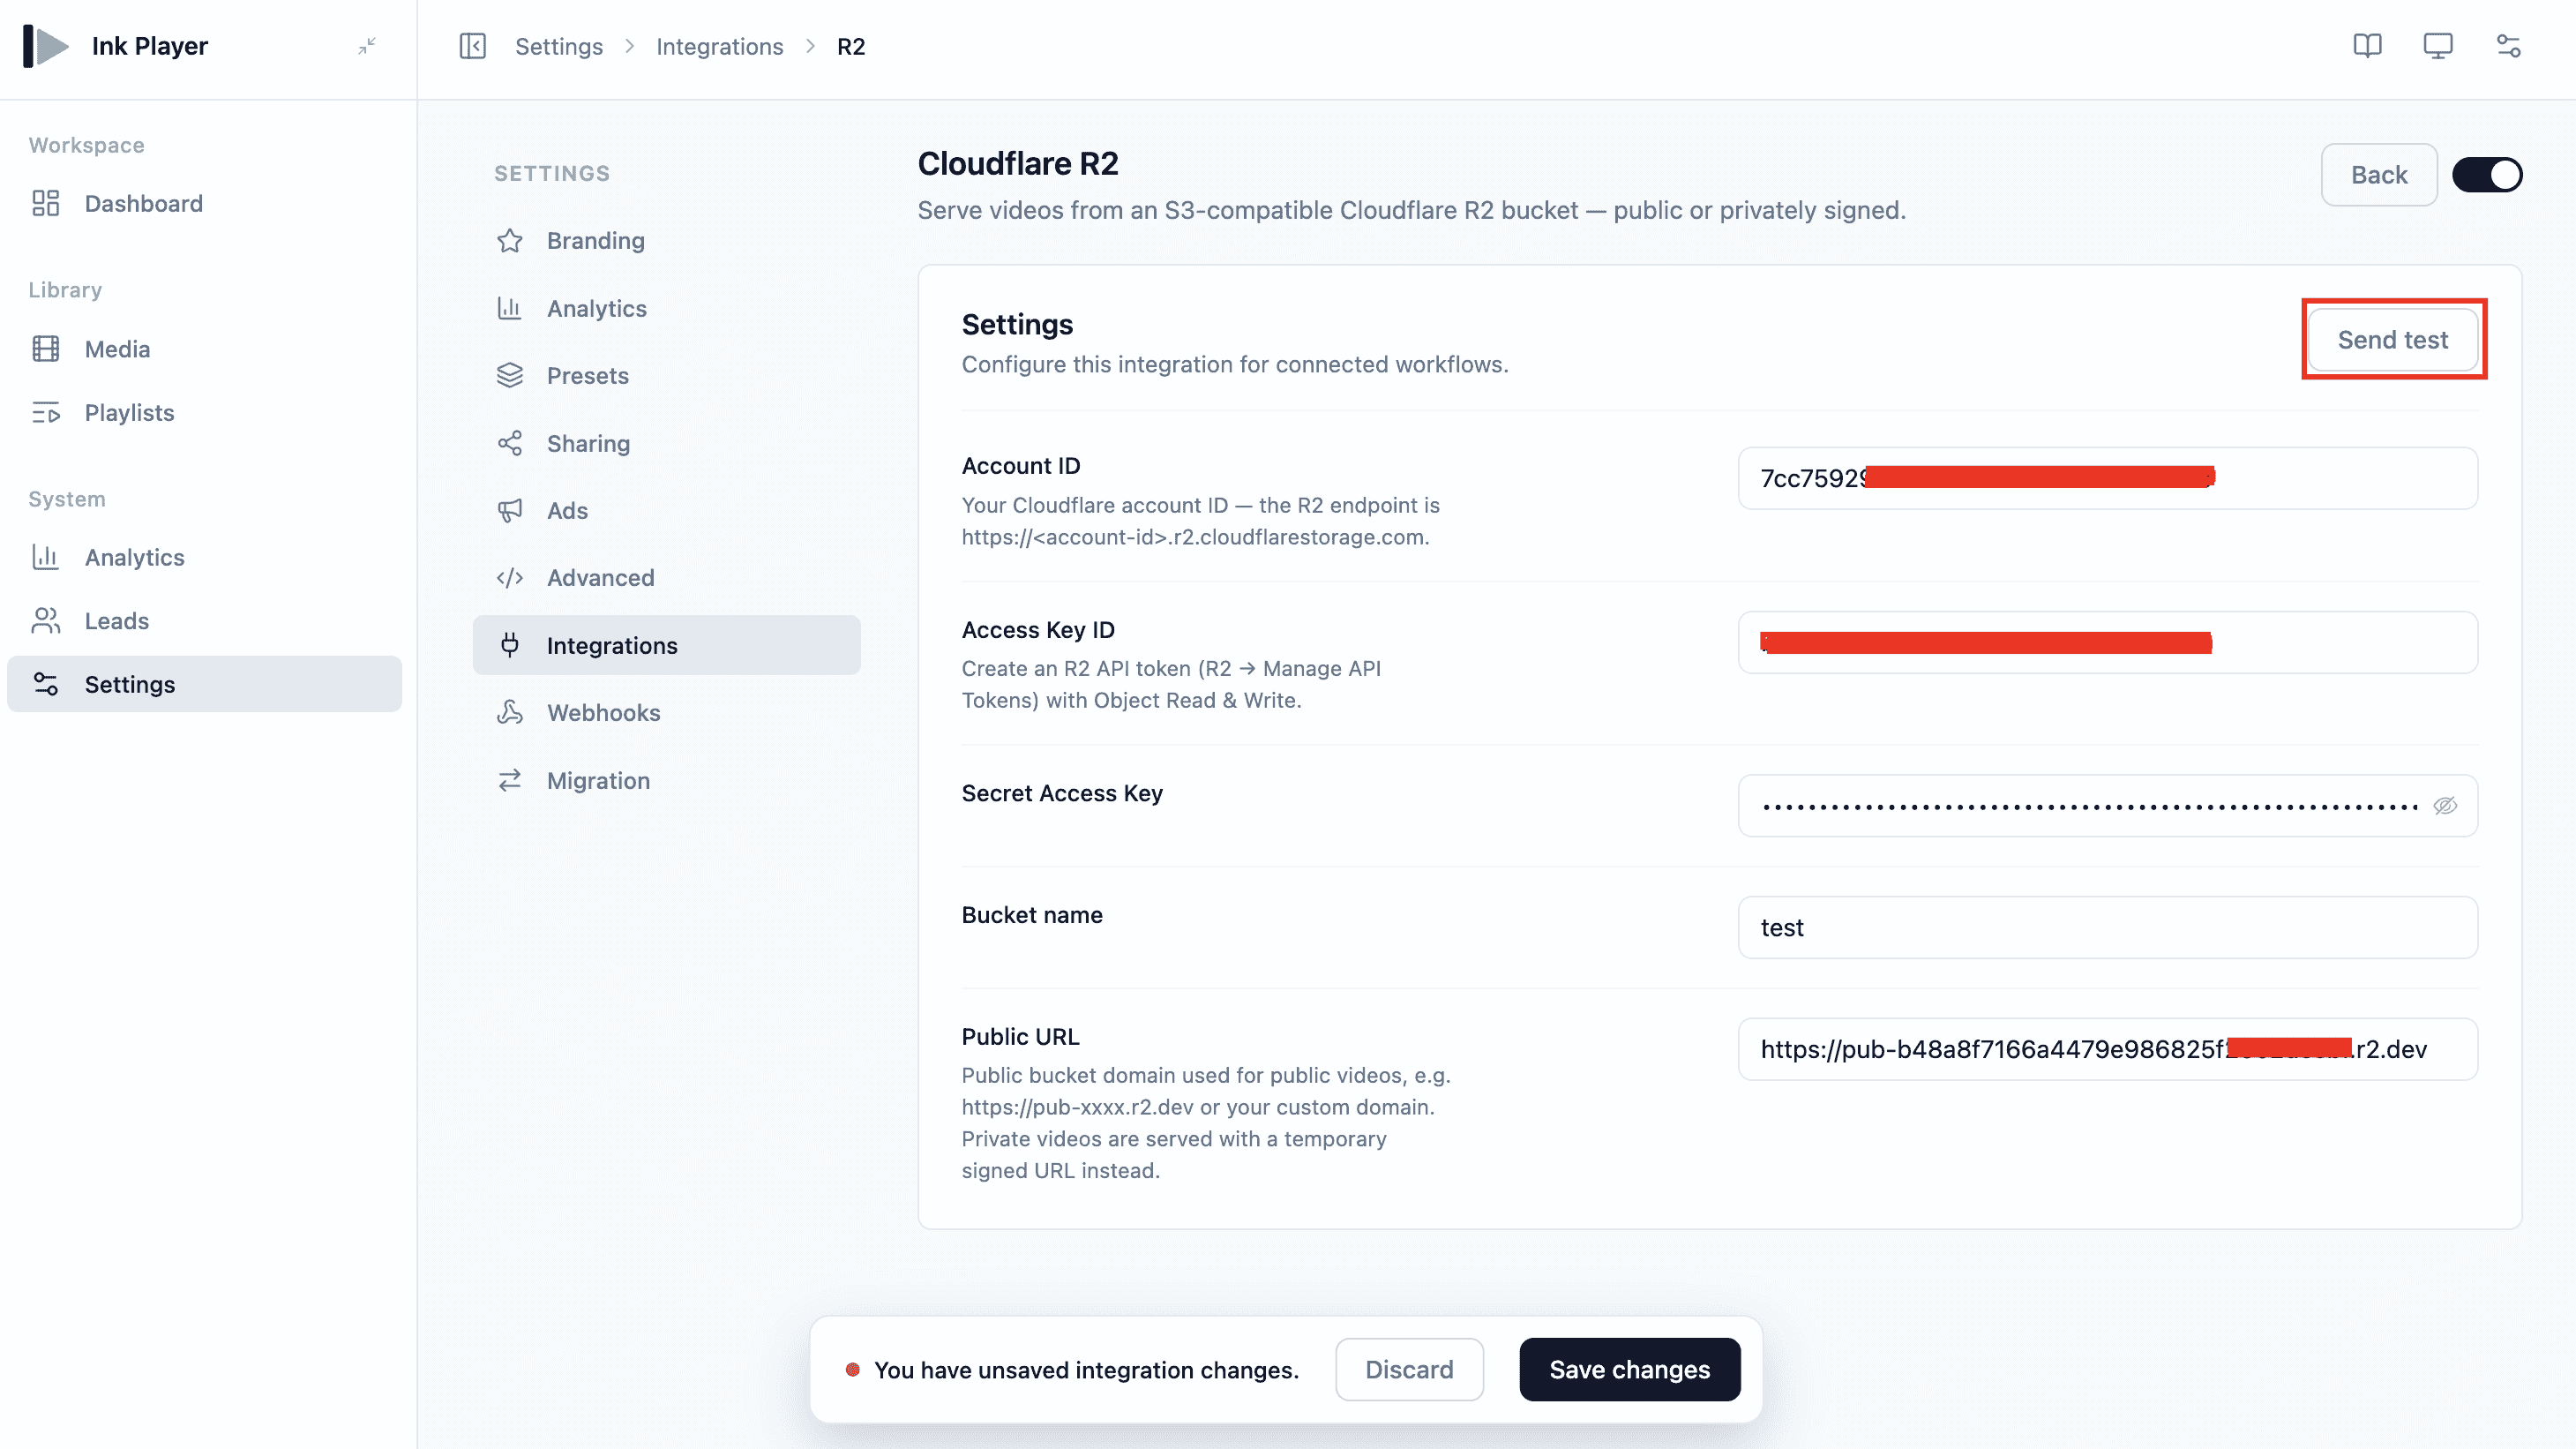
- Go to Settings → Integrations and enable Cloudflare R2 (under the Storage category).
- Click Manage to open its settings.
- Fill in Account ID, Access Key ID, Secret Access Key, and Bucket name. Add the Public URL if you set one up in Step 3.
- Click Send test to verify the connection, then Save changes.
Step 5 — Add Cloudflare R2 media
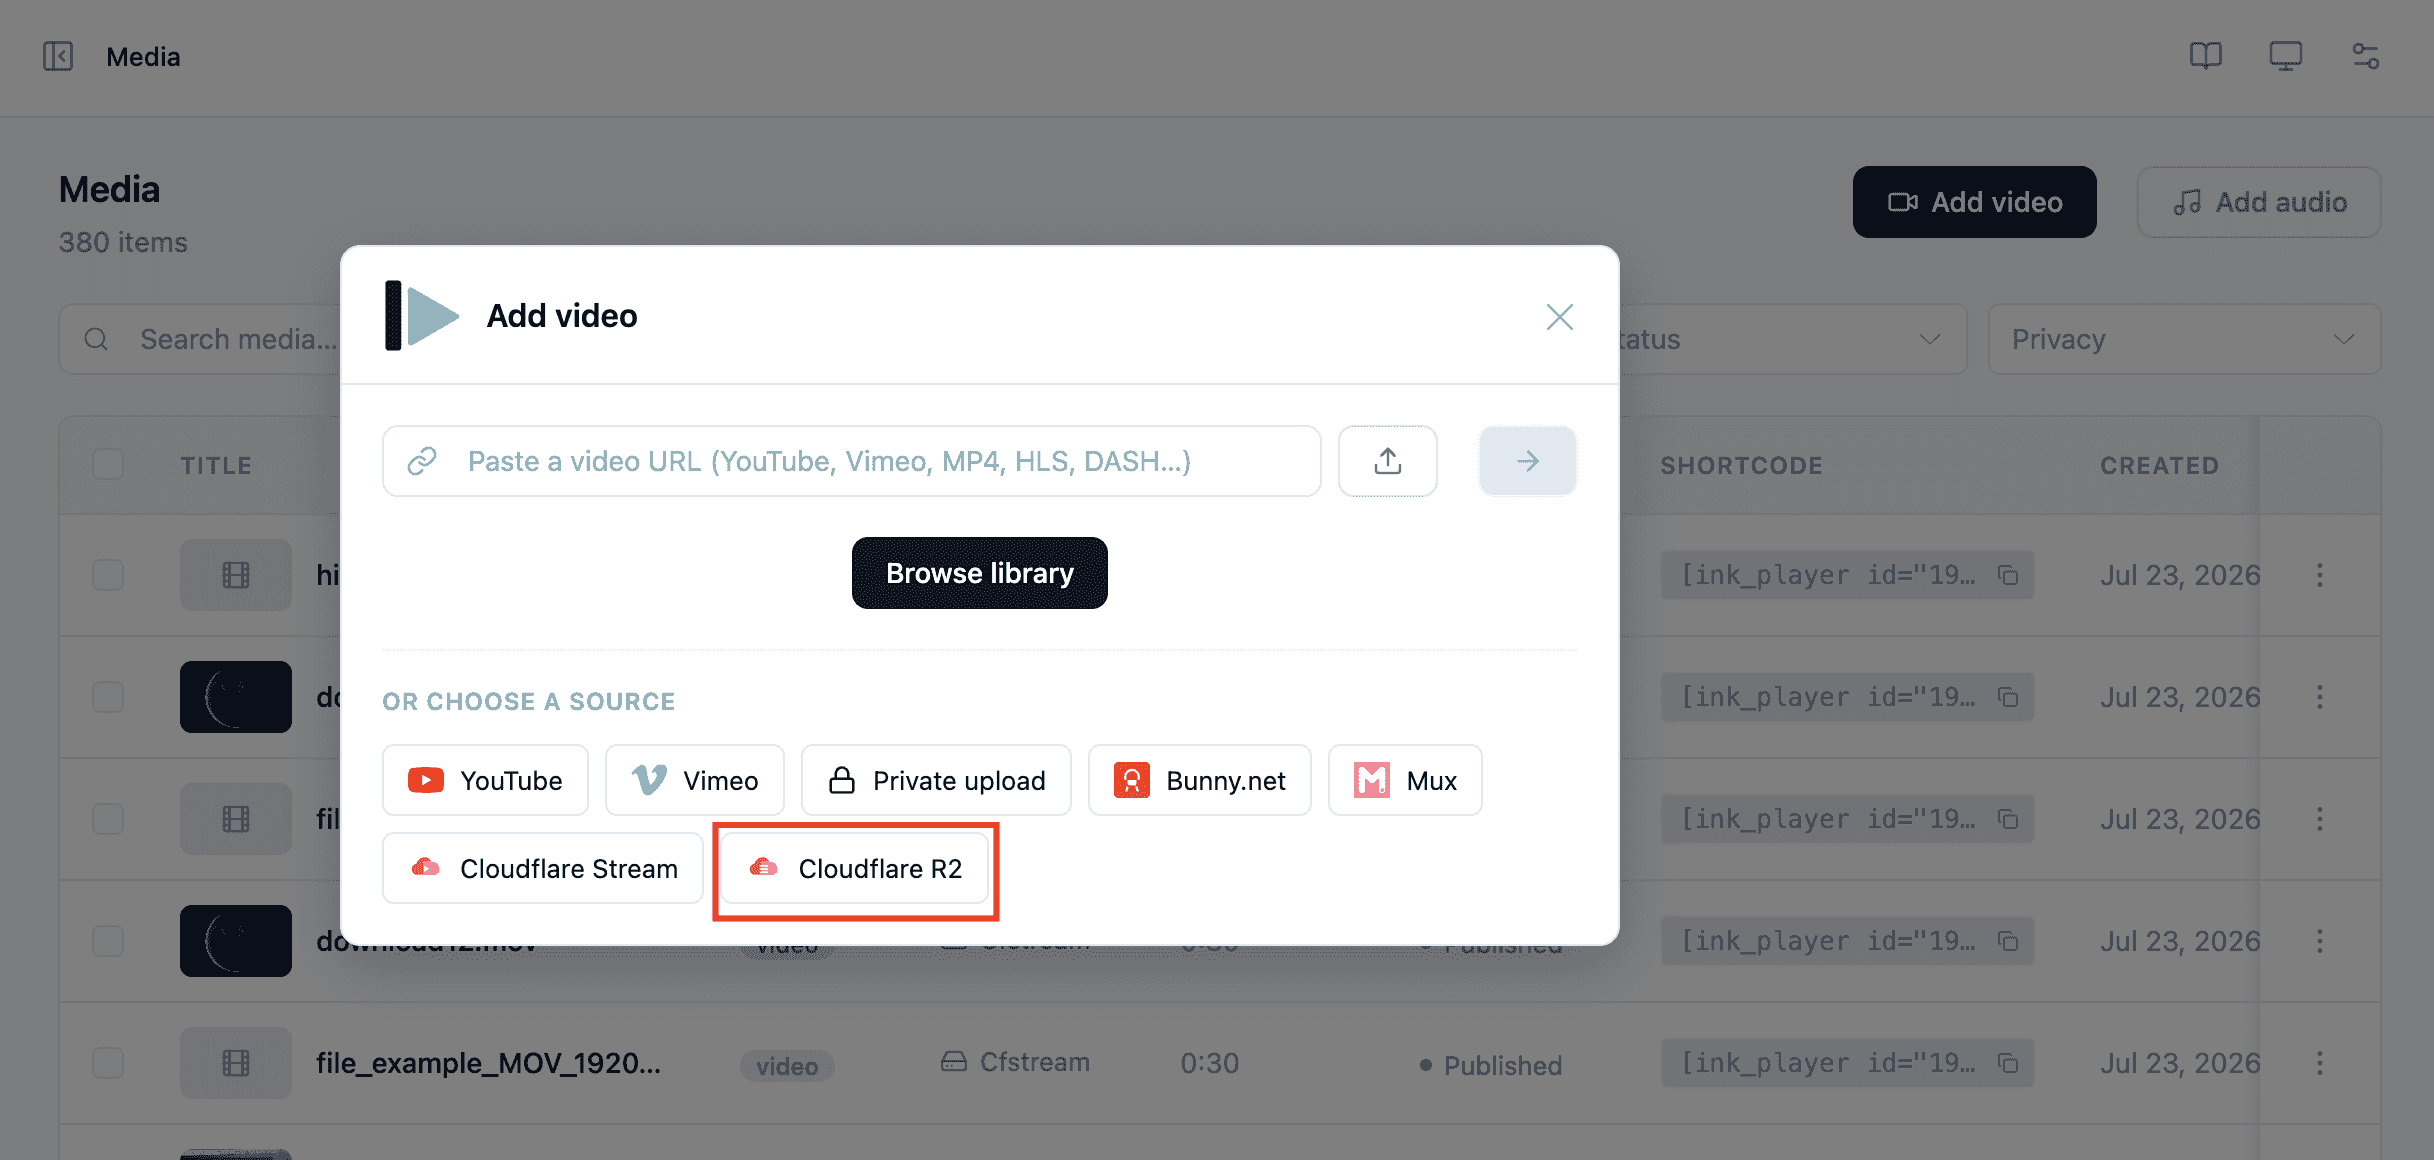
- Add an Ink Player block (or open Add video in your Media library).
- Under Choose a source, click Cloudflare R2.
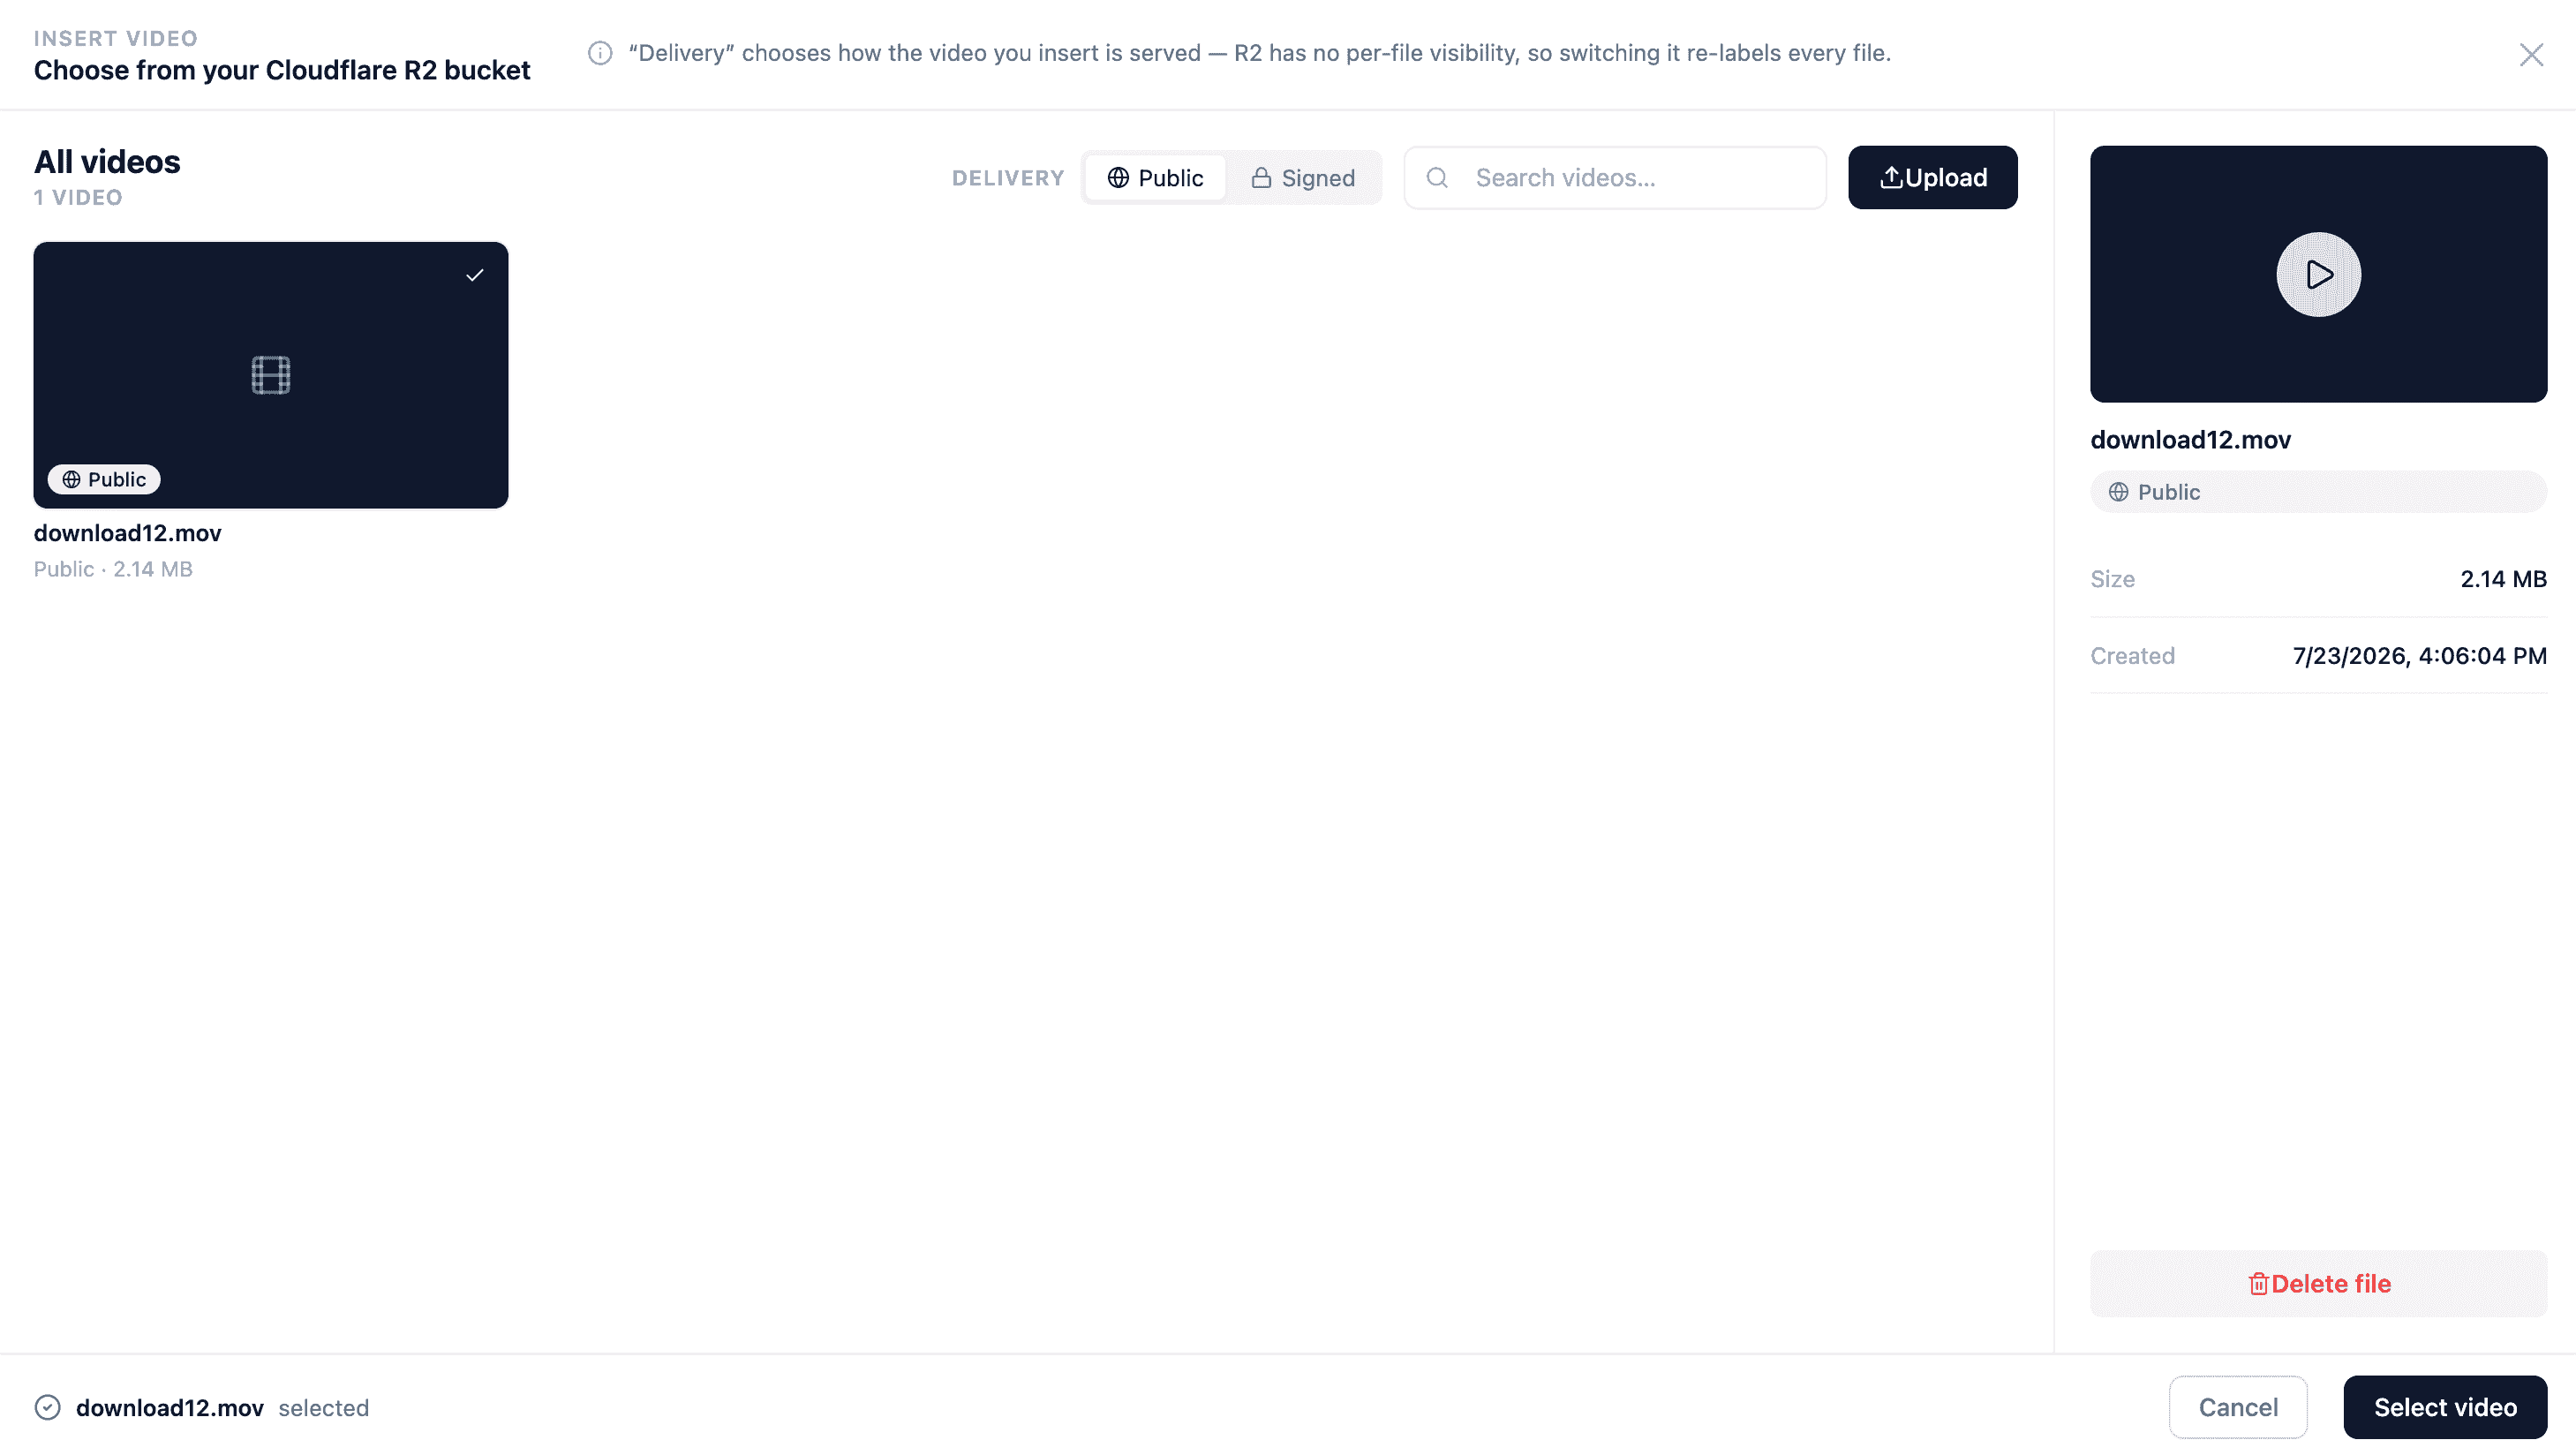
- The picker shows every video in the bucket in a flat list. Use the Delivery (Public / Signed) toggle to choose how the video you insert is served, search or browse, Upload a new file, then select a video and click Select video.
TIP
The Delivery toggle is a choice for the video you insert, not a per-file status — R2 has no per-file visibility, so switching it re-labels every card. Public serves the file from your Public URL; Signed serves it from a temporary signed URL.
Step 6 — The player renders
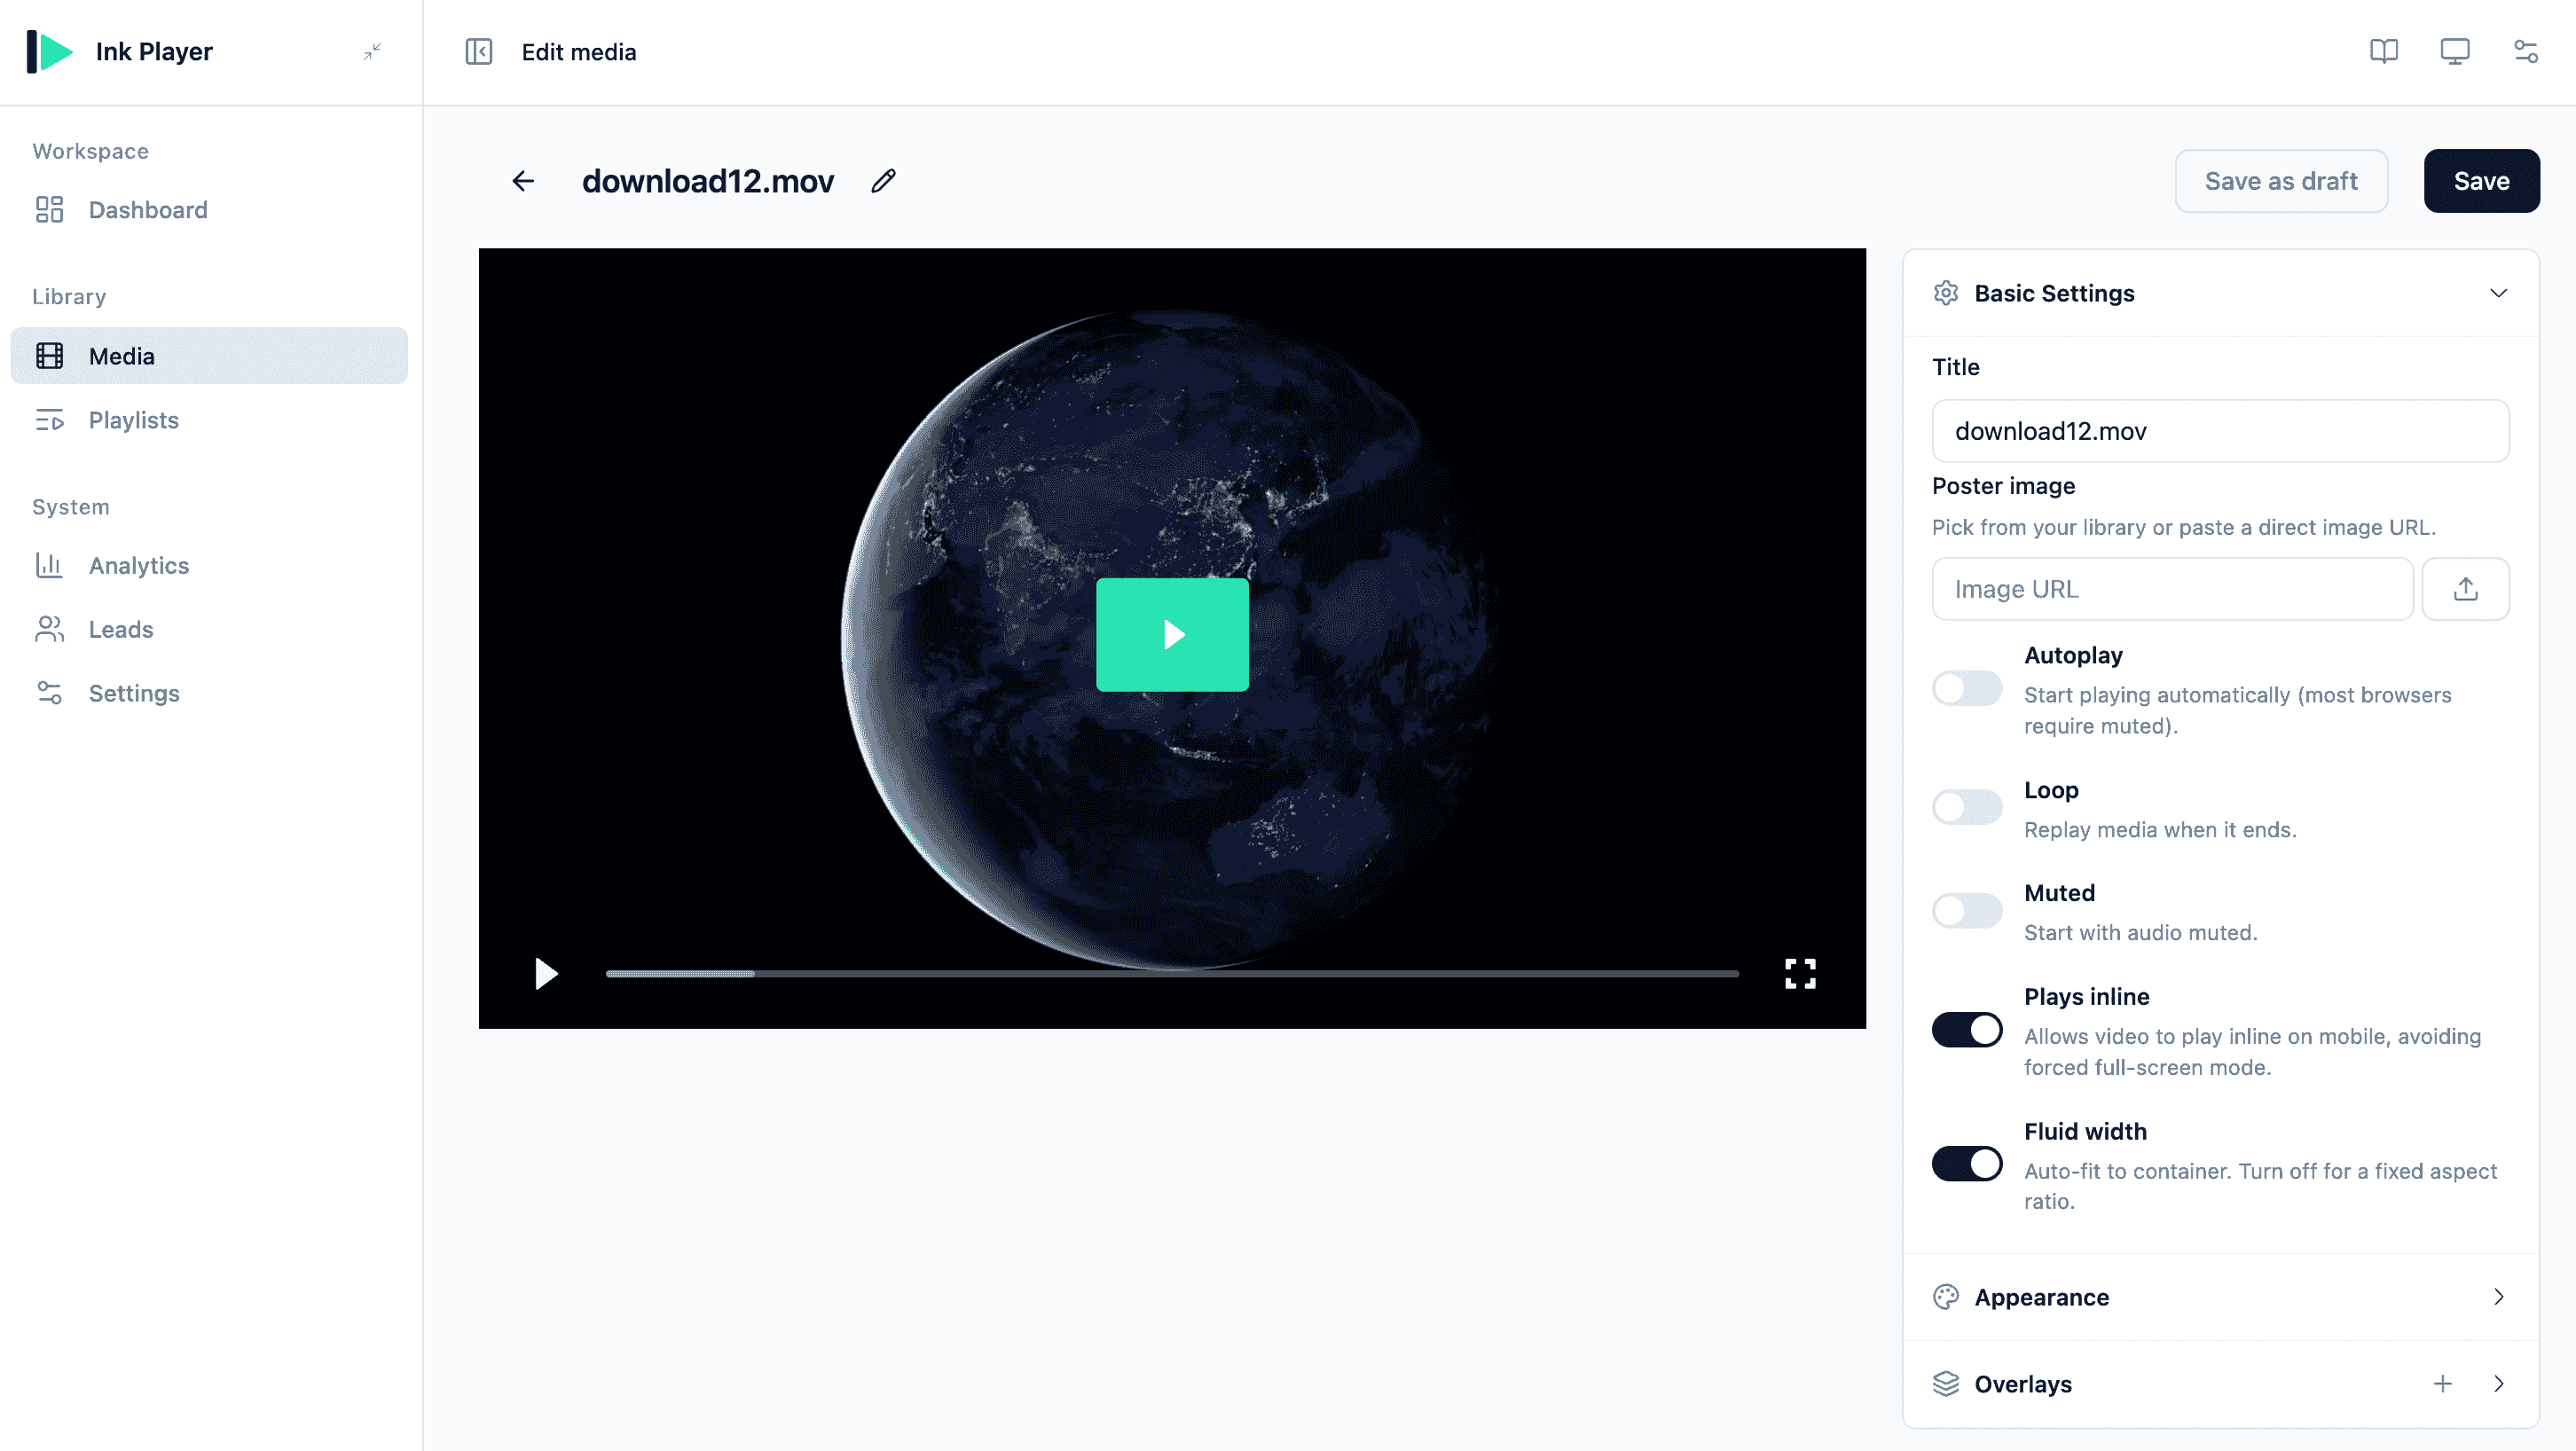
The selected video is added to your Media library and renders as an Ink Player — ready to place in a post, page, or builder, with all the usual player settings, presets, and overlays. Private videos are re-signed with a fresh, short-lived URL on every render.
Public vs. signed delivery
R2 is a single bucket, and the same object can be delivered either way — the Delivery toggle picks the method for the video you insert:
- Public — the video plays from your Public URL (r2.dev or custom domain). A plain, permanent, cacheable link. Requires public access enabled on the bucket.
- Signed — the video plays from a temporary presigned URL that Ink Player mints fresh on every render and that expires after a couple of hours. The file can stay fully private in the bucket; nothing is publicly reachable.
WARNING
Signed delivery protects the link — it expires — but doesn't by itself stop a viewer from sharing it while it's still valid. For hard gating, pair Signed with the media's Who can watch → Private/Password so links are only minted for authorized viewers. See Access control.
Settings reference
| Field | Required | Notes |
|---|---|---|
| Account ID | Yes | Your Cloudflare account ID — the R2 endpoint is https://<account-id>.r2.cloudflarestorage.com. |
| Access Key ID | Yes | From R2 → Manage R2 API Tokens (Object Read & Write). |
| Secret Access Key | Yes | Paired with the Access Key ID; shown only once in Cloudflare. |
| Bucket name | Yes | The exact bucket name. |
| Public URL | Public delivery only | Public bucket domain, e.g. https://pub-xxxx.r2.dev or your custom domain. |
Notes
- Public videos need the Public URL set and public access enabled on the bucket; without it, only signed (private) delivery works.
- Uploads go to the bucket root. Videos organized into folders (key prefixes) in the R2 console still appear in the picker's flat list.
- If R2 reports an access error, re-check the Access Key, Secret, bucket name, and that the token has Object Read & Write.