

Appearance
Mailchimp
Mailchimp is an email marketing platform. Connecting it makes Mailchimp a destination for the leads Ink Player captures through the email gate. When a viewer submits their email to keep watching, that Lead is added to a Mailchimp audience (list) of your choice.
What this enables
- Adds captured leads as subscribers in a Mailchimp audience.
- Lets you pick the target audience — and optional tags — per player, in the email-gate overlay.
- Verifies your connection before you rely on it, using Send test.
Prerequisites
- An active Mailchimp account.
- At least one audience (list) created in Mailchimp to receive leads.
Get a Mailchimp API key
Step 1 — Open your Mailchimp profile
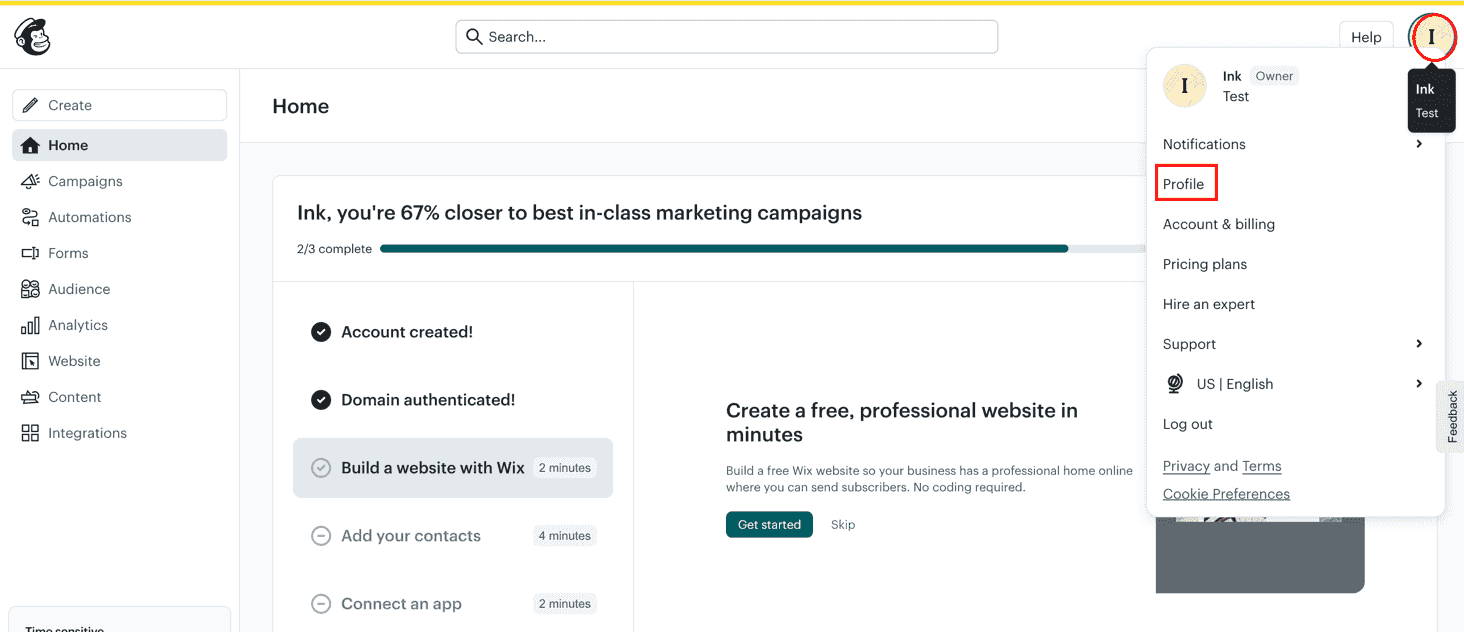
In your Mailchimp dashboard, click your profile icon (top right) and choose Profile.
Step 2 — Go to Extras → API keys
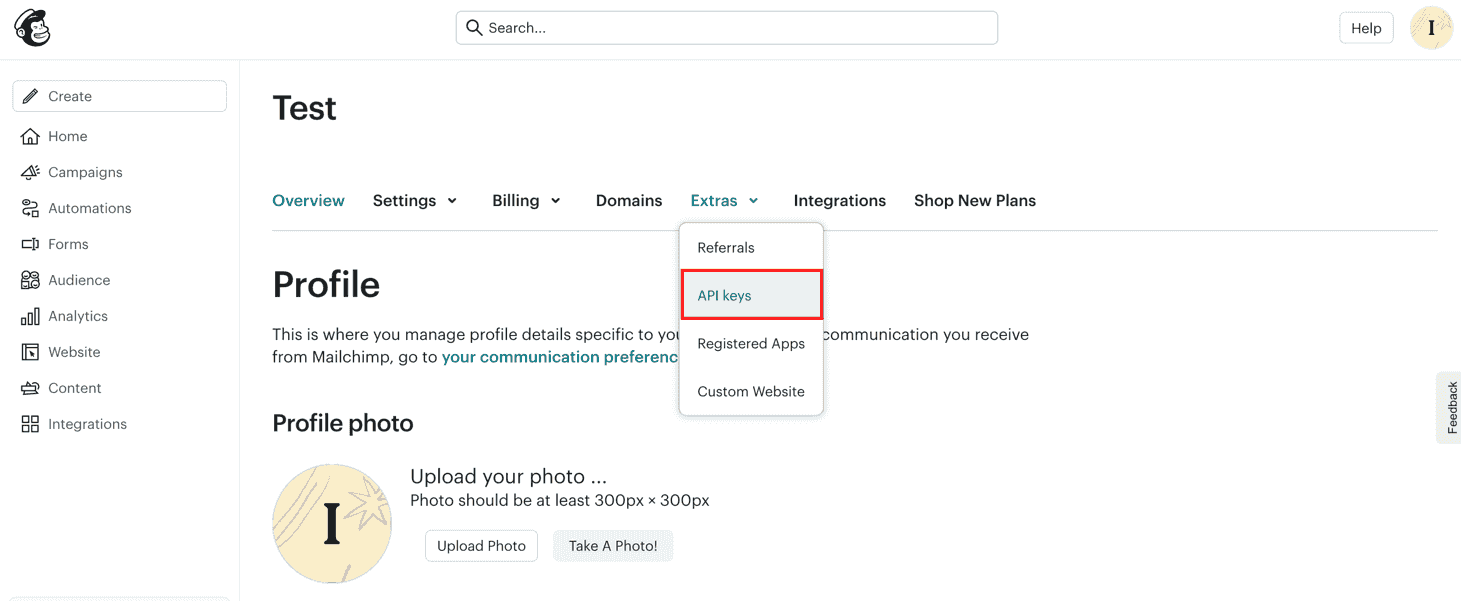
On the profile page, open the Extras menu and click API keys.
Step 3 — Create a key
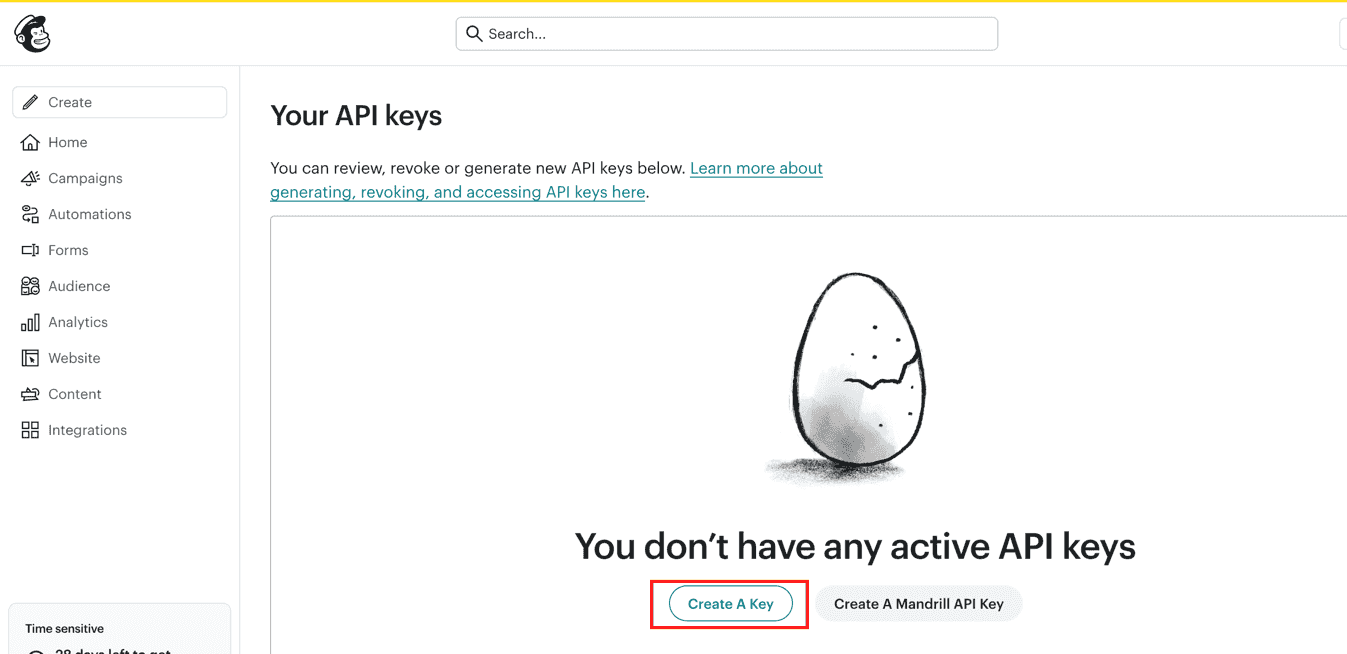
On the Your API keys page, click Create A Key.
Step 4 — Name and generate the key
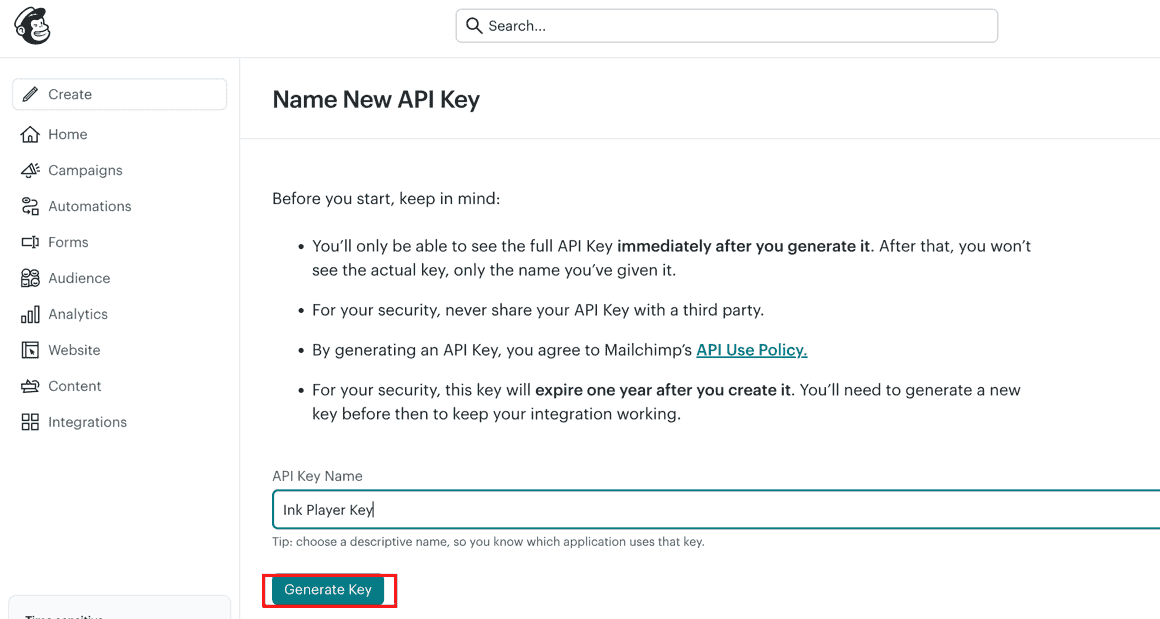
Give the key a descriptive name (e.g. Ink Player Key) and click Generate Key.
Step 5 — Copy the key
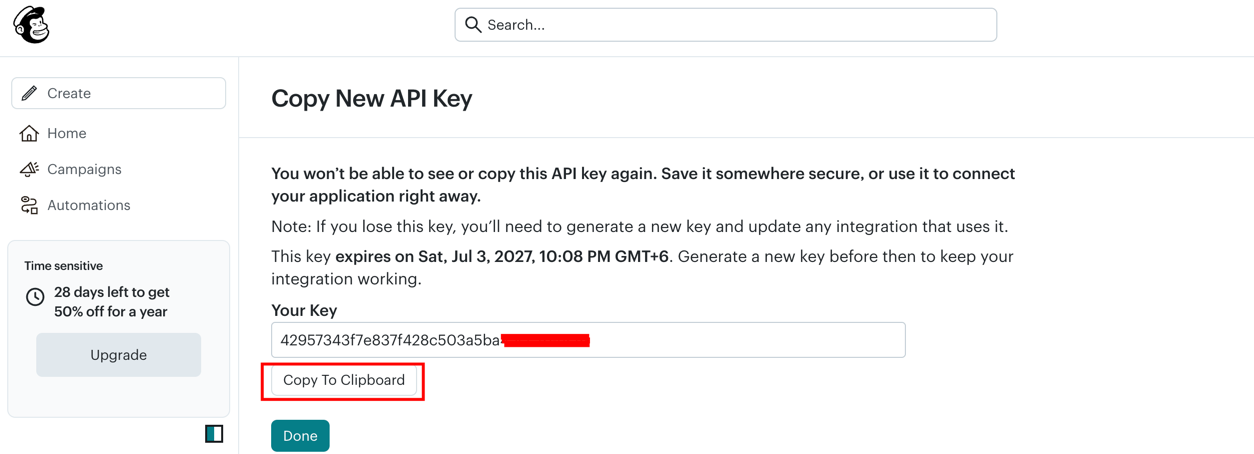
Copy the key with Copy To Clipboard — Mailchimp shows it only once, so save it now.
WARNING
Keep your API key private, and note that Mailchimp keys expire one year after creation — generate a new one before then to keep the connection working.
Connect and capture leads
Step 1 — Connect Mailchimp in Ink Player
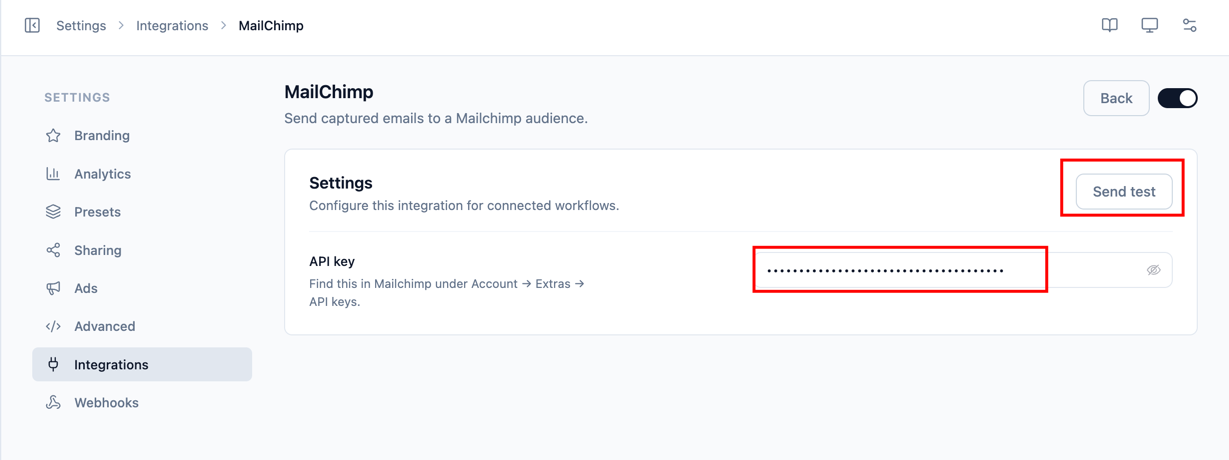
- Go to Settings → Integrations and enable Mailchimp (under the Email category).
- Click Manage.
- Paste your API key.
- Click Send test to confirm the key works, then Save.
Step 2 — Point a player's email gate at Mailchimp
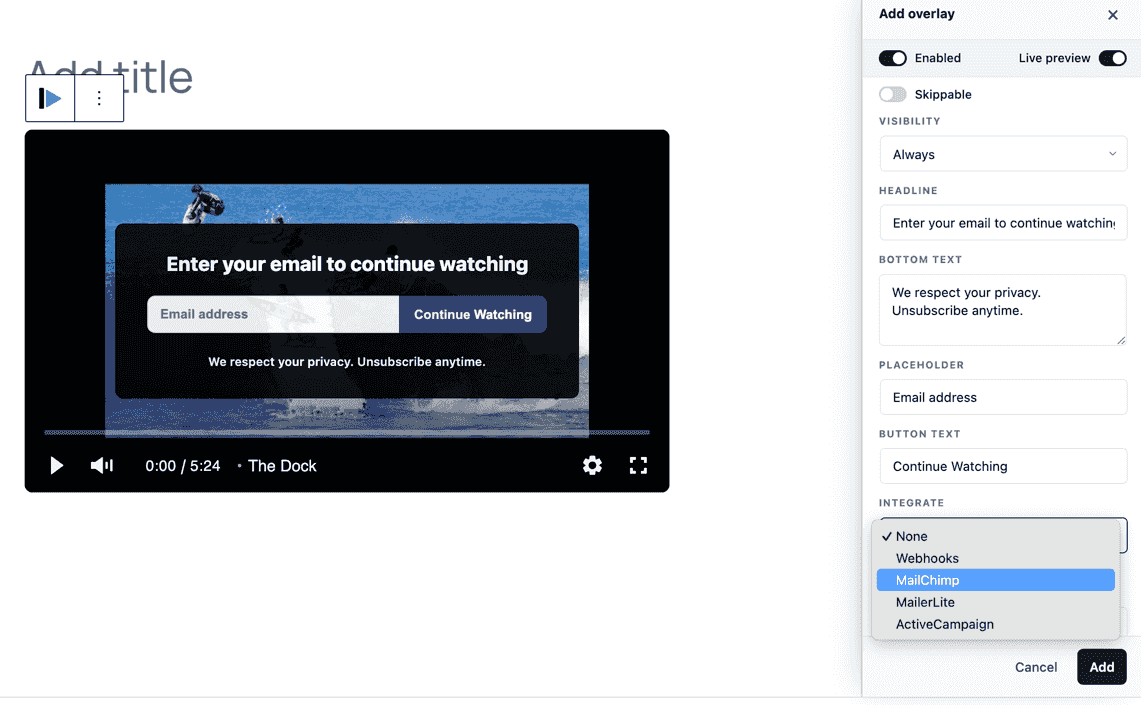
The audience is chosen per player, not on the Manage screen. Add an email-gate overlay to a player, and under Integrate, choose MailChimp — then pick the audience (and optional tags) to send captured emails to.
Step 3 — Viewers submit their email
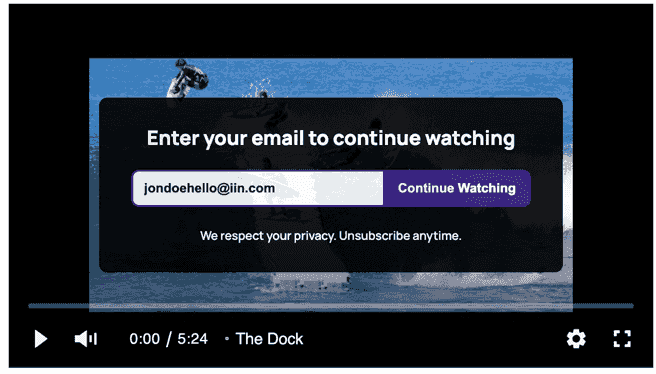
When a viewer reaches the gate, they enter their email to keep watching.
Step 4 — Leads arrive, tagged Mailchimp
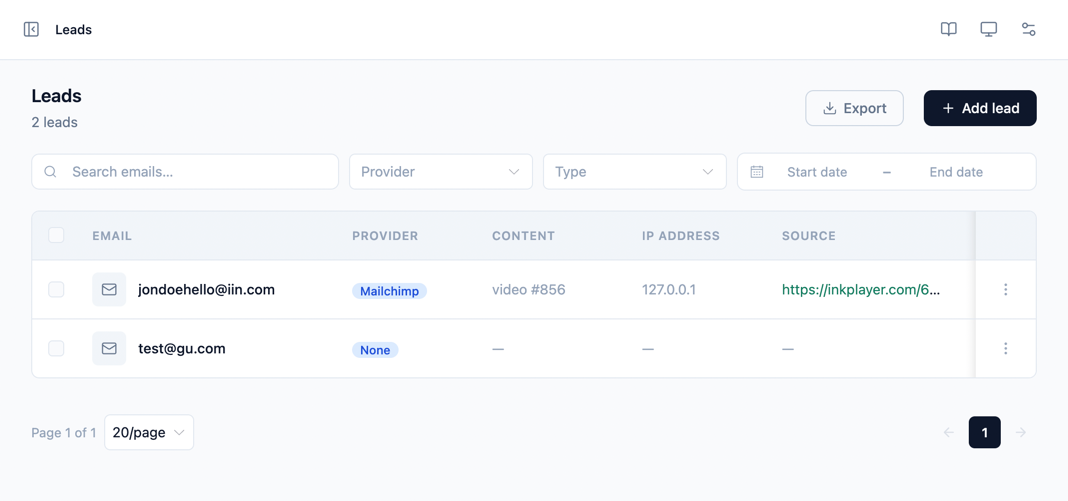
Each captured email appears on your Leads page with Mailchimp as its provider, and is added to the audience you chose.
Settings reference
| Field | Required | Notes |
|---|---|---|
| API key | Yes | Find or create this in Mailchimp under Account → Extras → API keys. |
Troubleshooting
- If Send test fails, re-check the API key and try again.
- No audiences in the overlay dropdown? Confirm the key is saved and that your account has at least one audience.